Sign In
Upload
Manuals
Brands
GE Manuals
Medical Equipment
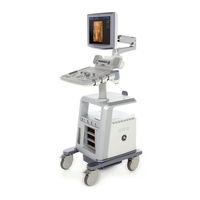
LOGIQ P5 OB
GE LOGIQ P5 OB Manuals
Manuals and User Guides for GE LOGIQ P5 OB. We have
1
GE LOGIQ P5 OB manual available for free PDF download: Service Manual
GE LOGIQ P5 OB Service Manual (532 pages)
Brand:
GE
| Category:
Medical Equipment
| Size: 47.33 MB
Table of Contents
Table of Contents
13
CHAPTER 1 Introduction
29
Overview
29
Purpose of Chapter 1
29
Purpose of Service Manual
29
Typical Users of the Basic Service Manual
30
LOGIQ™ P5 Models Covered by this Manual
30
Purpose of Operator Manual(S)
30
Important Conventions
31
Conventions Used in Book
31
Standard Hazard Icons
32
Product Icons
33
WEEE Label
35
Safety Considerations
40
Introduction
40
Human Safety
40
Mechanical Safety
40
Electrical Safety
41
Label Locations
42
Dangerous Procedure Warnings
44
Lockout/Tagout Requirements (for USA Only)
44
EMC, EMI, and ESD
45
Electromagnetic Compatibility (EMC)
45
CE Compliance
45
Electrostatic Discharge (ESD) Prevention
45
Customer Assistance
46
Contact Information
46
System Manufacturer
47
CHAPTER 2 Pre-Installation
49
Overview
49
Purpose of Chapter 2
49
General Console Requirements
50
Console Environmental Requirements
50
Electrical Requirements
51
EMI Limitations
53
Scan Probe Environmental Requirements
54
Facility Needs
55
Purchaser Responsibilities
55
Required Features
56
Desirable Features
56
Recommended and Alternate Ultrasound Room Layout
57
Networking Pre-Installation Requirements
58
CHAPTER 3 Installation
61
Overview
61
Purpose of Chapter 3
61
Installation Reminders
62
Average Installation Time
62
Installation Warnings
62
Safety Reminders
63
Receiving and Unpacking the Equipment
64
Moving into Position
69
Adjusting System Clock
69
Product Locator Installation Card
69
Preparing for Installation
70
Verify Customer Order
70
Physical Inspection
70
EMI Protection
70
Completing the Installation
73
Power Off/ Shutdown
74
Transducer Connection
75
System Configuration
76
System Specifications
76
Electrical Specifications
78
On-Board Optional Peripherals
78
External I/O Connector Panel
79
Video Specification
81
Setting VCR (Mitsubishi MD3000) USB Interface
82
Available Probes
83
Software/Option Configuration
83
Connectivity Installation Worksheet
84
Insite IP Address Configuration
85
Loading Base System Software
85
CHAPTER 4 Functional Checks
87
Overview
87
Purpose of Chapter 4
87
Required Equipment
87
General Procedure
88
Power On/Boot up
88
Power off / Shutdown
90
System Features
91
System B/M-Mode Checks
94
System CFM and PWD Checks
95
Basic Measurements
96
Probe/Connectors Usage
98
Using Cine
99
Image Management (QG)
100
Using the DVD-R
101
Backup and Restore Database, Preset Configurations and Images
105
ECG Check out
111
Software Configuration Checks
111
Peripheral Checks
112
Monitor Function Checks
113
15" LCDMON II Assy & LCD Panel with Filter Function Validation Procedure
113
15" OSD Key Assy Function Validation Procedure
114
Keyboard Function Checks
115
Main Keyboard Assy Function Validation Procedure
116
Sub Keyboard Assy Function Validation Procedure
118
Trackball Assy Validation
118
A/N Key Assy Validation
118
Freeze Key Validation
118
TGC Key Assay / TGC Knob Set Validation
119
Sub Keyboard Encoder Knob Set Validation
119
Mechanical Function Checks
120
Cover Parts Function Validation
120
LCD Plastic Filter Function Validation Procedure
121
Air Filter Set Function Validation Procedure
121
Keyboard Encoder Knob Set Function Validation Procedure
122
Cup Holder Function Validation Procedure
123
Front Caster/Rear Caster Function Validation Procedure
124
Probe Holder Function Validation Procedure
125
Flexible LCD Arm Function Validation Procedure
126
Board Function Checks
127
CL1TRX Assy / BL1TRX Assy Function Validation Procedure
127
ACWD Assy Function Validation Procedure
128
Probe Assessment Diagnostic Test Validation Procedure
132
SYSCONML Assy Function Validation Procedure
133
APS/APS Pro Assy PCB Function Validation Procedure
134
P3RLY,P2RLY and P2RLY with Dummy Assy Function Check Procedure
135
SOM Function Validation Procedure
136
ASIG Assy Function Validation Procedure
136
Backplane Assy Function Validation Procedure
137
Nest Fan Function Validation Procedure
138
Transbox Function Validation Procedure
138
ACPC Assy Set Function Validation Procedure
138
Transbox Assy Function Validation Procedure
139
Fuse Set Function Validation Procedure
139
ARP Assy Function Validation Procedure
139
Site Log
140
5394141, Revision
141
CHAPTER 5 Components and Functions (Theory)
141
Overview
141
Purpose of Chapter 5
141
General Information
142
Block Diagram
143
LOGIQ™ P5 Block Diagram
144
LOGIQ™ A5/A5Pro Block Diagram
145
Main Board Detail
149
P3RLY and P2RLY
151
CL1TRX and BL1TRX
152
Sysconpm(Sysconcm)
156
SOM Module
159
Top Console
166
Keyboard
166
ARP (Rear Panel)
170
Input/Output Signals for Peripheral
171
Power Diagrams
172
Overview
172
TRANSBOX(AC Power)
172
APS/APS Pro (LV Power & HV Power)
173
AC Power Outlet for Peripheral
174
Cable Connection
175
Overview
175
Internal Cable
175
Peripherals and Cable Connection
176
Filters
179
Fans
179
Service Platform
180
Introduction
180
Global Service User Interface (GSUI)
181
Service Home Page
182
Error Logs Tab
183
Diagnostics
185
Image Quality
186
Calibration
186
Configuration
187
Utilities
189
Replacement
190
Remote Software/Option Installation and Updates
191
RFS (Service for Request)
193
System Checkout Procedure
193
Sending RFS Procedure
194
Machine RFS
196
General
196
Enabling MRFS
196
Fast Polling
199
General
199
Enabling Fast Polling
199
CHAPTER 6 Service Adjustments
201
Overview
201
Regulatory
201
Monitor Adjustments
202
Rotate and Tilt the Monitor
202
Brightness and Contrast
203
LCD Plastic Filter
204
Flexible LCD Arm - Locking Mechanism
206
Trackball Cleaning
207
CHAPTER 7 Diagnostics/Troubleshooting
210
Gathering Trouble Data
210
Overview
210
Collect Vital System Information
210
Collect a Trouble Image with Logs
211
Screen Captures
212
Check and Record the P2 Key Function
212
Setting the P2 Key to Screen Capture
213
Capturing a Screen
214
Reset the P2 Key to Customer's Functionality
215
Diagnostics
216
Common Diagnostics
217
Utilities
217
PC Diagnostics (Non-Interactive Tests)
218
PC Diagnostics (Interactive Tests)
222
FRU Test
225
LED Descriptions
229
CL1TRX/BL1TRX Assy
229
P3RLY/P2RLY Assy
229
SYSCONPM/SYSCONCM Assy
229
APS/APS Pro Assy
230
Trouble Shooting Tree
231
System Does Not Power on / Boot up
231
System Does Not Boot
232
Noise in Image
235
Unable to Scan
236
Trackball
237
Monitor Troubleshooting
238
Unable to Record to VCR
240
Printer Troubleshooting
241
DVD-RW Troubleshooting
243
Network Troubleshooting
244
CHAPTER 8 Replacement Procedures
247
Overview
247
Disassembly/Re-Assembly
248
LCD Plastic Filter
249
Monitor Cover Set
251
OSD Button and Lamp Set, LCD Plastic Filter
255
LCD Std Arm with Cover
256
Monitor Assy
258
Flexible LCD Arm Removal Procedure
259
Main Keyboard Assy
283
Sub Keyboard Assy
286
Trackball Assy
288
English, Greek, Russian, Swedish, Norwegian A/N Key Assy
289
Freeze Key Assy
291
TGC Key Assy / TGC Knob Set
293
Sub Keyboard Encoder Knob Set
295
Keycap Set, Main Keyboard Encoder Knob Set
296
Side Left Cover
297
Side Right Cover
299
Front Cover
300
Rear Cover
302
Middle Cover
304
Top Cover
306
Top Bottom Cover
307
Pole Cover
308
Neck Front
309
Neck Rear
311
Dummy Cover L / R
313
EMI Cover L
315
EMI Cover R
316
APS/APS Pro Assy
317
CL1TRX Assy / BL1TRX Assy
320
P3RLY / P2RLY Assy & P2RLY with Dummy
322
Backplane Assy
324
ACWD Assy
326
SYSCON PM Assy/Syscon CM Assy
328
PM SOM Assy with 1G/ CM SOM Assy with 512M
332
ASIG Assy
334
Battery on SYSCONPM/CM Assy
335
Front Caster / Rear Caster
337
Rear Handle
339
Rear Hook
340
Probe Holder
342
Cup Holder
343
ECG Cable Hook
344
Air Filter Set
345
DVD R/W Drive
346
Nest Fan Assy
348
ARP Assy 110V/220V
350
SATA HDD Assy
352
ACPC Assy
355
Transbox Assy 110V/220V
357
Fuse Set
360
Read and Write Serial Info
361
Software Loading Procedure
365
General
365
Parts Required
365
Timerequired
365
Software Loading Steering Guide
366
Before Starting Software Loading
367
Software Installation
377
Installing Base Image Software
378
Verifying Base Image Software
382
Installing Application Software
390
Standard Confirmation & Functional Checks
393
Full Backup / Restore Procedure
409
General
409
Parts Required
409
Full Backup Procedure
410
Restore Procedure
412
General
413
Mechanical Option Installation Instruction
424
Endo Probe Holder Installation
425
Microphone Option Fixture Installation
426
Drawer Option Installation
429
Cable Arm Hook Installation
430
BW Printer Fixture Keyboard Installation
432
BW Printer Fixture Middle Installation
434
Color Printer Fixture Middle Installation - UP23MD Printer
437
Color Printer Fixture Middle Installation - UP-D25MD Printer
438
Printer VCR DVD Fixture Top Installation - UP23MD Printer
440
Color Printer Fixture Top Installation - UP-D25MD Printer
442
Printer VCR DVD Fixture Top Installation - CP900 Printer
445
Printer VCR DVD Fixture Top Installation (MD-3000)
448
Printer VCR DVD Fixture Top Installation (MD-800)
454
Rear Handle Installation
457
Additional Task Lamp Installation
460
Protect Cover Installation
461
Swivel Lock Caster Installation
462
LOGIQ A5 Rear Swivel Caster Installation
463
BT11 Drawer Option Installation
464
MTZ PROBE HOLDER Installation
467
DVR Fixture Top Installation - SONY DVO-1000MD DVD Recorder
468
Phi(Protecting Health Information) DATA COMMUNICATION
471
Prevent Exporting Patient Data to Removable
471
Encryption Procedure
472
CHAPTER 9 Renewal Parts
477
Overview
477
List of Abbreviations
478
Monitor
480
Keyboard
482
Covers
484
Pcb
486
Body
488
Power
491
Cables
493
Options
496
Software
497
Probes
498
Peripherals
500
CHAPTER 10 Care & Maintenance
501
Overview
501
Periodic Maintenance Inspections
501
Why Do Maintenance
502
Keeping Records
502
Quality Assurance
502
Maintenance Task Schedule
502
How Often Should Care & Maintenance Tasks be Performed
502
Tools Required
504
Standard GE Tool Kit
504
Special Tools, Supplies and Equipment
506
System Maintenance
507
Preliminary Checks
507
Functional Checks (See also Chapter 4)
508
System Checks
508
Peripheral/Option Checks
509
Input Power
509
Mains Cable Inspection
509
Cleaning
509
Physical Inspection
510
Optional Diagnostic Checks
511
Probe Maintenance
511
Electrical Safety Tests
512
Safety Test Overview
512
GEMS Leakage Current Limits
513
Outlet Test - Wiring Arrangement - USA & Canada
514
Grounding Continuity
515
Chassis Leakage Current Test
517
Isolated Patient Lead (Source) Leakage-Lead to Ground
519
Isolated Patient Lead (Source) Leakage-Lead to Lead
522
Isolated Patient Lead (Sink) Leakage-Isolation Test
522
Probe Leakage Current Test
524
When There's too Much Leakage Current
528
Advertisement
Advertisement
Related Products
GE LOGIQ P5
GE LOGIQ P3 BT10
GE ProSeed EF
GE LOGIQ P7
GE Voluson P6
GE LOGIQ LP6 PRO BT11
GE PDM
GE P4 Series
GE DINAMAP PRO 300V2
GE LOGIQ P10
GE Categories
Refrigerator
Ranges
Microwave Oven
Air Conditioner
Dishwasher
More GE Manuals
Login
Sign In
OR
Sign in with Facebook
Sign in with Google
Upload manual
Upload from disk
Upload from URL