Sign In
Upload
Manuals
Brands
GE Manuals
Medical Equipment
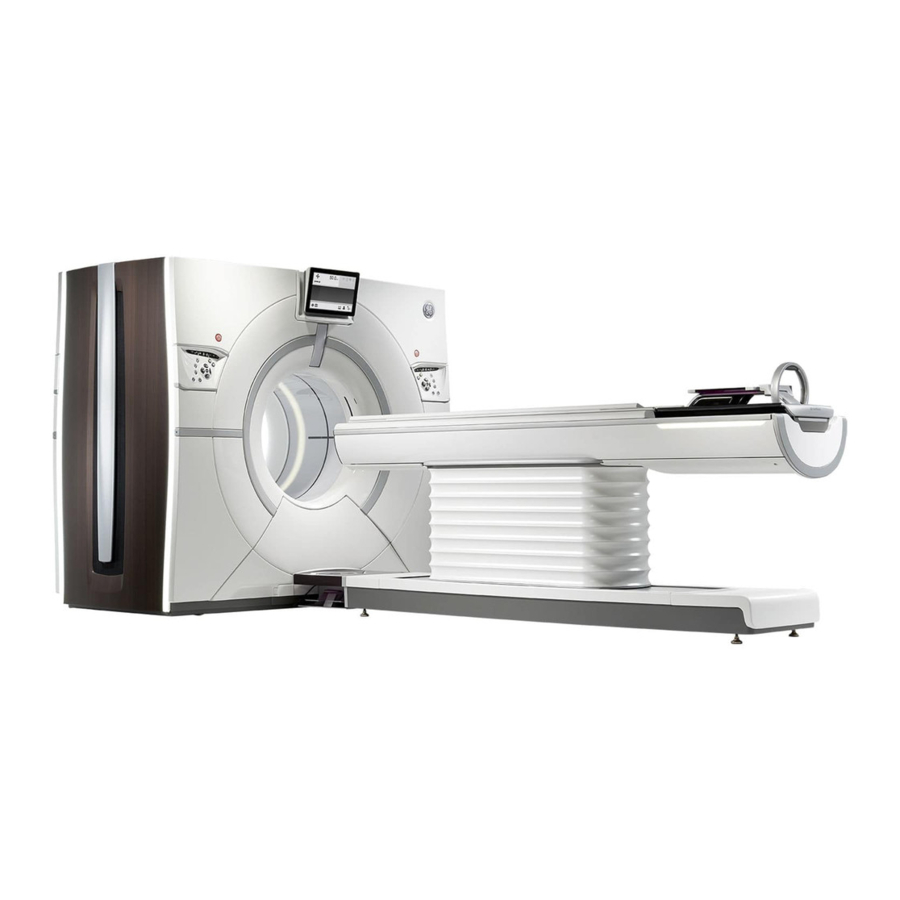
Revolution CT
GE Revolution CT Manuals
Manuals and User Guides for GE Revolution CT. We have
1
GE Revolution CT manual available for free PDF download: User Manual
GE Revolution CT User Manual (702 pages)
Tomography Scanner
Brand:
GE
| Category:
Medical Equipment
| Size: 16.29 MB
Table of Contents
Table of Contents
5
Chapter 1 USER INFORMATION
37
Introduction
37
User Documentation
38
GE Approved Accessories
39
Chapter 2 REGULATORY INFORMATION
41
Applicable Regulations and Standards
41
Product Description
43
Intended Use of the System
43
Indications for Use of the System
43
Contraindications
43
Product Manufacturer
44
Chapter 3 SAFETY
45
General Safety Guidelines
45
Safety Conventions
47
Symbols and Warning Labels
48
Symbols
48
Equipment Warning Labels
52
Laser Warning Labels
52
X-Ray Warning Labels
53
Power Distribution Unit (PDU) Warning Labels
54
External Accessory Labels
55
Scanner Desktop Labels
55
Radiation Safety
59
X-Ray Protection
59
General Radiation Safety
60
Scans Acquired at the same Tomographic Plane
61
Geometric Dose Efficiency
61
Backup Timer Indicator
62
Starting Scans from the Scan Room
62
Ctdi
62
Implantable Device Safety
64
Recommendations Prior to Scanning
64
Recommendations after Scanning
64
Electrical Safety
65
Electromagnetic Compatibility Safety
68
Fire Safety
69
Mechanical Safety
70
General Mechanical Safety
70
Patient Positioning
70
Gantry Air Inlets
73
Emergency Devices and Emergency Egress
74
Emergency Devices
74
Emergency Stop
74
System Emergency off Buttons Using Main Disconnect Control
75
Emergency Patient Care During X-Ray on
76
Emergency Egress
76
Laser Safety
77
Reconstructed Image Orientation
79
Data Safety
81
Application Specific Safety Topics
83
Axial and Helical Scanning
83
Cardiac Imaging
83
CT Integrated Cardiac Module
85
Advanced Application Safety
85
Measurements
85
Segment Tools
86
Filming and Saving Images
86
Application Software Safety
88
Accuracy of Measurements
89
Measure Distance for Axial, Helical, and Cine Images
89
Measure Distance for Scout Images
89
Measure Angle
90
Voxel Dimensions
91
Roi
91
CT Number
91
CT Number Accuracy
92
CT Number Mean and Standard Deviation
92
Range, Precision and Accuracy of Displayed Values
92
Accessory Safety
93
Monitor Safety
93
Pole Safety
93
Systems with Metal-Free Cradles and Accessories
94
Power Injector Safety
94
Phantom Safety
94
Maintenance and Cleaning
95
Hazardous Substances
96
System Performance
97
Chapter 4 READ ME FIRST
99
About this Manual
99
Notices
99
Purpose of this Guide
99
Prerequisite Skills
99
Scan Monitor
100
New Patient
100
Patient Schedule
101
Scan Setup
102
Image Monitor
108
Icons and System Status Area
108
Reconstruction and Image Processing Area
110
Image Viewports
112
File Manager
113
User Interface Conventions
116
Select Items from a List
116
Cancel
116
Button and Text Appearance
116
Pop-Up Windows
117
Mouse Controls
117
System Troubleshooting Tips
119
Chapter 5 PEDIATRICS and SMALL PATIENTS
121
Overview
121
Radiation Exposure
122
Radiation Exposure Sensitivity
122
Dose Reporting Considerations
122
Minimize Pediatric and Small Patient Doses
123
Perform Only Necessary CT Examinations
123
Scan Only the Organ or Anatomical Region Indicated
123
Consider Using In-Plane Bismuth Shields
124
Lower Ma Settings for Chest and Bone Imaging
124
Make a Kid Friendly Environment
124
Minimize Multi-Phase Contrast CT Examinations
124
Properly Center All Patients in the Gantry
124
Scan Signal-To-Noise
124
Use Pediatric Positioning Accessories
124
Pediatric and Small Patient Scans
126
Optimize Pediatric Protocols for Your Facility
126
Pediatric Protocols
126
Color Coding for Kids Protocol Selection
127
Set up a Pediatric or Small Patient Exam
128
Adjust Pediatric and Small Patient Scan Parameters
129
Adjust the Parameters by Size, Age, Weight, Height, and Indications
129
Consider Decreasing the Kv
130
Center the Patient Properly When Using Smartma
131
Increase the Pitch
131
Use Small SFOV Filters
131
Chapter 6 LARGE PATIENT
133
Overview
133
Large Patients
134
Scanning Large Patients
134
Patient Weight and Patient Size
134
Perform Only Necessary CT Examinations
134
Properly Position Large Patients in the Gantry
134
Guidelines for Adjusting Individual Exposure Parameters by Patient
135
Adjust Parameters
135
High Kv
135
Lower Pitch / Slow Rotation Time
135
Ma Adjustment
135
Scan Type
135
Increase Slice Thickness
136
Radiation Exposure and Dose Reporting
136
Chapter 7 DOSE CHECK
137
Overview
137
Introduction
137
Protocol Considerations
138
Terminology
138
Alert Value (AV)
138
Dose Check Administrator
138
Dose Check AV Exceeding User
138
Notification Value (NV)
138
Protocol Change Control
138
Set the Dose Check Administrator Role
139
Set the Dose Check AV Exceeding User Role
141
Configure the System for Dose Check
143
Configure the AV by Age Threshold
145
Build Protocols with Access Controls
147
Build Protocols with Notification Values
148
Build Protocols with Notification Values by Factor
149
Scan Using Alert Value Checking
150
Scan Using Notification Value Checking
152
Use the Dose Audit Tool
154
Display a Dose Check Log
154
Display the Protocol Summary
154
Display the Invalid Protocols
154
Export Dose Check Log, Protocol Summary, Invalid Protocols Data and User
154
Protocols
154
Chapter 8 EQUIPMENT
157
Overview
157
Scanner Desktop
158
Computer
160
Reconstruction Hardware
160
Monitors
160
Scan Control Interface and Keyboard
161
Preset W/L Keys - F5 through F11
163
Page Up/Page down Keys
163
W/L Control Keys
163
Operate the Mouse Controls
163
Gantry
165
Gantry Display
165
Internal Components
168
Gantry and Console Interfaces
169
Left Rear Plug-In Panel
170
Console AC Power Box
171
Operate the Gantry Controls
172
Cardiac Trigger Monitor
175
Integrated Cardiac Trigger Monitor
175
External Cardiac Trigger Monitor
176
Table
178
System Operation and Limitations that Reduce the Risk of Collision with the Patient
178
Use the Load/Unload Foot Pedals
180
Patient Comfort and Accessories
180
Cradle Extender, Axial and Coronal Head Holders
180
Cradle Pad
180
Catheter Bag Holder
181
Cradle Extender Pad
181
Patient Arm Board
181
Pole
181
Positioning Straps
181
Hardware Components
183
Components
183
Coverage
183
Axial Interval
183
Helical Pitch, Scan Mode, and Collimation
183
Detector Configuration
184
Axial
184
Helical
184
Power Distribution Unit
185
System Cabinet
186
Ray Tube and Generator
187
X-Ray Tube
187
Generator Serial Load Rating
187
Purchasable Options
189
Chapter 9 STARTUP and SHUTDOWN
191
Overview
191
System Startup and Shutdown
192
Prepare the System
192
Log On/Log off
192
Logon Window
192
Log off
194
Log on
194
Start up the System
195
Routine Daily Start up from System Shutdown
195
Routine Daily Start up When the System was Not Shut down
195
Start up from Power off
196
System Start up Failures
196
Shut down or Restart the System
196
Considerations
196
Shutdown Process
196
Restart Process
197
Daily Quality Assurance
198
Tube Warmup
198
Calibration
198
Daily Calibration
198
Full System Calibration
198
Non-GE X-Ray Tube
198
Daily QA Workflow
199
Tube Warmup
199
Run Fast Calibrations
202
Chapter 10 PATIENT SCHEDULE
203
Overview
203
Patient Schedule
204
Schedule Features
204
Schedule Columns
204
Schedule Window
204
Schedule Buttons and Icons
205
Schedule Dropdown Menu
206
New and Completed Records
207
Add a Patient to the Schedule
207
Edit a Patient in the Schedule
208
Delete a Patient from the Schedule
209
View more Patient Information on the Schedule
210
Select a Patient from the Schedule
210
Check a Patient's Status
210
Search for a Patient on the Schedule
211
HIS/RIS Search
211
Setting up the HIS/RIS Refresh
213
Update the Patient Schedule
215
Chapter 11 SCAN
217
Overview
217
Scan Theory
218
Dose Deterministic Effects
218
CT Perfusion
220
Purpose of CT Perfusion
220
Body Perfusion Considerations
221
Components of a CT Perfusion Study
221
Perfusion Acquisition Types
221
Considerations for Peak Skin Dose
222
Kv Effects on Dose
222
Ma Effects on Dose
222
Scan Parameter Effects on Dose
222
Contrast Injection Considerations
223
Other Considerations and References
223
Required Image Attributes for Perfusion Imaging
223
Recommended Reading
224
Total Scan Time
226
Automatic Exposure Control
227
Adaptation to Anatomy
227
How AEC Works
227
AEC Does Not Guarantee Reduction of Radiation Doses in All Patients
228
Effect of AEC Control Setting
228
When Not to Use AEC
228
When to Use AEC
228
AEC Considerations of Patient Size, Shape, Composition, and Age
229
Dynamic AEC Scanning
229
How to Tell if the Dose Has Changed
229
Summary
229
AEC Messaging
230
Slice Thickness Reference Noise Index and Noise Index Values
231
Smartma/Odm
232
Smartma
232
Smartma Background
232
Smartma Theory
233
References
234
Smartma Faqs
234
Organ Dose Modulation (ODM)
239
Smartma
239
Kv Assist
241
Kv Assist Background
241
Kv Assist Theory
242
Image Display
243
Kv Assist Faqs
243
References
244
Exam Workflow
245
Exam Workflow Concepts
245
Positioning a Patient
245
Using Contrast
245
Using Protocols
245
Exam Workflow Windows
245
Patient Information Window
245
Patient Position Area
246
Scan Settings Window
247
Exam Workflow Procedures
249
Set up and Position the Patient
250
Set up the Patient's Information
252
Enter Patient ID or Accession Number with the Bar Code Reader
254
Modify the Patient Information Presets
254
Select a Protocol
255
Acquire a Scout
256
Adjust the Graphic Rx
257
Enter Contrast Descriptions
261
Adding a Contrast Preset
262
Selecting a Contrast Preset
262
Start a Scan
262
Abort a Scan in Progress
264
Close the Exam
264
Duplicate a Series
264
Emergency Stop Scan, Electronics, and X-Radiation
264
Pause a Scan in Progress
264
Stop a Scan
264
Scan Parameters
265
Scan Type
265
Axial
265
Cardiac Axial
265
Cine
265
Helical
265
Hi Res Mode
265
Rotation Time
266
Coverage Speed Collection
266
Kv and Ma Control
270
Kv Mode
270
Manual Kv Mode
270
Kv Assist Kv Mode
271
Ma Mode
271
Manual Ma Mode
272
Smartma Mode
272
Ma Max and Ma Min
273
ODM Mode
273
Noise Index
275
Cardiac Modulated Ma
276
Anatomy Selection
276
Scan Parameters Workflow
277
Choose the Scan Type
279
Set the Coverage Speed Options
280
Set the Kv and Ma Control
281
Set the Ma
281
Set the Kv
282
Set the Anatomy Selection
283
Set the Scan Field of View
283
Set the Start and End Locations
283
Set the Display Field of View (DFOV) for the Primary Recon
284
Set the A/P Center Coordinates for the Primary Recon
285
Set the R/L Center Coordinates for the Primary Recon
285
Timing Parameters
287
Timing Parameters Collection
287
Timing Parameters Workflow
287
Set Prep Delay Time
287
Set Inter Scan Delay Time
288
Recon Parameters
289
Recon Parameter Descriptions
289
Axial Plus Recon Mode
289
Cardiac Axial Plus Recon Mode
289
Full and Plus Recon Modes for Helical Scan Types
289
Hi Res
289
IQ Enhance for Helical Scan Types
289
Recon Type
289
Flip / Rotate
290
Quality Check (QC) Images
290
Copy Forward
291
Primary Recon Collection
291
Primary Recon Parameters Workflow
293
Set the Image Interval
293
Set the Slice Thickness
293
Set the Recon Type
294
Adjust Window Width and Window Level for All Scan Types
295
Asir-V for All Scan Types
295
IQ Enhance
295
Recon Mode
295
Set Recon Options for Helical Scan Types
295
Image Flip Orientation for All Scan Types
296
Secondary Recon Parameters
296
Overlapped Axial Recon Mode
299
Secondary Recon Slice Thickness
299
Auto Voice
301
Auto Voice Workflow
301
Set the Auto Voice Language
301
Set the Voice/Lights/Timer Options
302
Change the Auto Voice Preset Delay
302
Additional Scan Features
303
Add or Delete a Group
303
Add a Group
303
Delete a Group
303
Duplicate a Series
303
Optimize Technical Parameters
303
Optimize Patient Dose
304
AEC with Cardiac Modes
304
Organ Dose Modulation (ODM)
304
Pediatric Protocols
304
Smartma
304
Adaptive Statistical Iterative Recon (Asir-V)
305
Advanced Artifact Reduction (AAR)
305
Auto Gating Configuration
305
Dose Reports
305
Kv Assist
305
Smarthelical
305
View the Dose Report
305
Dose Report Generation
305
Prerequisites
305
Dose Information
306
Chapter 12 SCAN APPLICATIONS
307
Overview
307
Asir-V
308
Asir TM -V Theory
308
Dose Adjustment Factor - Manual Ma Method
309
Reconstruction
310
Asir-V Image Annotation
311
Acquire a Scan
311
Smartprep
312
Smartprep Workflow
312
Smartprep Windows/Elements
313
Smartprep Baseline Setup Window
313
Monitor Phase Setup Window
316
Monitor Phase Window
317
Set up a Smartprep Series
319
Acquire a Scan Without Dynamic Transition
322
Baseline Phase Without Dynamic Transition
322
Monitor Phase Without Dynamic Transition
323
Acquire a Scan with Dynamic Transition
324
Baseline Phase with Dynamic Transition
324
Monitor Phase with Dynamic Transition
324
Scan Phase - Diagnostic Scan
325
Enhanced Xtream Injector
326
About Enhanced Xtream Injector
326
Indications for Use
326
Protocol Considerations
326
Enhanced Xtream Injector Window
326
Contrast Report
329
Set up the Enhanced Xtream Injector
329
Chapter 13 CARDIAC
331
Overview
331
Cardiac Workflow
332
Prepare the Patient
332
Breathing Instructions
332
Consent Forms
332
Exam Prep Instructions
332
Setup and Contrast
333
Attach ECG Electrodes to the Patient
333
Adjust ECG Trigger Device Settings
337
Check Electrode Impedance
337
External ECG Trigger Device
337
Gantry Display
337
User Console
337
Electrode Impedance Check Results
338
Initiating Electrode Impedance Check
338
Acquire a Scout Scan
338
Acquire a Heart Localizer or Calcium Score Scan (Optional, but Recommended)
339
Acquire a Manual Bolus Timing Scan
340
Acquire a Contrast Enhanced Cardiac Scan
342
Cardiac Scan Parameters
345
Scan Type
345
Primary Recon
345
Secondary Recon
345
Cardiac Scan Modes
345
Anatomy Selection
346
Considerations
346
Graphic Prescription (Graphic Rx)
346
Scan Overlap
347
Single Table Position
347
Set the ECG and Gating Settings
347
Auto Gating
348
Acquisition Window Part 1
349
Gating Based on
349
Acquisition Window Part 2
350
Acquisition Window Part 3
350
Adaptive Gating
351
Arrhythmia Retrigger
351
Cardiac Phase Background
351
HR Variation Allowance
351
Coverage Speed
353
Detector Coverage (MM)
353
Minimum Time between Passes
353
Number of Passes
353
Single Table Position
353
Display an ECG Trace on the Operator Console
353
Cardiac Modulated Ma
355
Auto Gating
356
Auto Gating Acquisition Settings
356
Auto Gating Configuration Window
357
Automatically Record the Heart Rate During Breath Hold
359
Manually Record the Heart Rate During Breath Hold
360
Manual Mode
360
Cardiac Recon
362
Cardiac QC Recon
362
Primary Recon
362
Recon Link to Auto Gating
362
Prescribing Basic Cardiac Secondary Recons
362
Interactive ECG Editor
364
Graphically Adjust Reconstruction Timing
365
Method 1
365
Method 1 and 2
365
Method 2
365
Insert, Delete, or Move an R-Peak Trigger
365
Change Heartbeat from Arrhythmia Retrigger to Reconstruct
366
Display Secondary Recon Images
366
Cardiac Image Annotation
366
Edited Cardiac Image Annotation
366
Snapshot Freeze
367
Chapter 14 VIEW IMAGES
371
Overview
371
Viewports Overview
371
File Manager Overview
372
Reconstruction and Image Processing Overview
373
Additional Considerations
373
Image Display
374
Access Images in File Manager
374
Selecting Images in File Manager
375
Selecting Images Using Keyboard Commands
378
Access Images from the Reconstruction and Image Processing Window
378
Selecting Viewports for Images in the Reconstruction and Image Processing Task List
382
Auto-View
382
Viewport Priority
382
View Images in a Cine Loop
382
View a Reference Image
384
Image Tools
386
Display Normal
386
Edge, Smoothing and Lung Enhancement Filters
386
Considerations
387
Applying Filters
388
Gray Scale Enhancement
388
Flip/Rotate Images
390
DICOM Gray Scale Presentation State (GSPS) Objects
391
Create a GSPS Object
391
View a GSPS Object
391
Magnify or Minify an Image
391
Apply a Matte
392
Move, Resize, Hide, or Delete a Matte
392
Place a Matte
392
Move Images Within a Viewport
392
Inverse the Video Display
392
Adjust the W/L
392
Function Keys
393
Mouse
393
Measurements
394
Measure a Density Reading
394
Use MIROI Density Reading to Calculate Bolus Timing
395
Add a Grid
396
Measure Distance
396
Report a Cursor
397
Additional Image Tools
398
Annotate an Image
398
View an Exam or Series Text Page
399
Hide, Show, or Remove Graphics
400
Save an Image Screen
401
Cross-Reference Images on a Scout
401
Command Line
402
User Preferences
406
Set Annotation Preferences
406
Set Series Binding Preferences
409
Chapter 15 DISPLAY APPLICATIONS
411
Overview
411
Add/Subtract
412
Add/Subtract Basic Terminology
412
Add/Subtract and Image Combination Window
412
Add/Subtract Images
416
Bind Series
417
Create Images with Min/Max Values
417
Direct Multi Planar Reformat (DMPR)
419
Reformat Tools Panel
420
Icons
421
Processing and Transfer Status Indicators
422
Reformat Processing Order
422
Reformat Settings Panel
422
Protocol Settings
423
Batch Options
424
Output Options
425
Transfer Options
426
Auto-Run/Run Button
427
Reformat Planning
428
Automatic Reformat
428
Semi-Automatic Reformat
428
Graphic Object for Oblique Reformats
429
Manual Reformat
429
Graphic Object for Rotate Reformats
430
Modify Active (Yellow) Annotation
431
Cursor
432
Exam Split
434
Exam Split Configuration
434
Hard Mode
434
Virtual Mode
434
Selecting Exams to be Split
434
Split Exams When the Scan Is Completed
435
Chapter 16 REFORMAT
441
Overview
441
Indications for Use
441
User Profile
441
Requirements for Reformat
441
Considerations
442
Reformat
443
Open Reformat
443
Use the Reformat Image Controls
443
Change the Image Orientation
444
Roam (Pan) Images
444
Rotate Freehand or
444
Select Objects
444
W/L Images
444
Zoom (Magnify) Images
444
Activate the Oblique Mode
445
Use the Keyboard Shortcuts
445
Use the Right-Click Functions
446
Display
448
Annotation
448
Roi
449
Modify Active (Red) Annotation
449
Review Controller Screen
451
Display Tab
453
My Tools Tab
455
View Tools
455
Add a Tool
456
Move or Hide the Palette
456
Remove a Tool
456
Color Map Table Screen
456
ROI Preferences Screen
458
Annotate an Image
459
Save Preset Annotation
460
Measure
460
Measure Distance
460
Measure Angle
461
Measure Area
461
Measure Volume
461
Manage Colormaps
461
Add an ROI
462
View Types
464
Create a Curved View
464
Create an X Section Histogram View
464
Create an MPVR View
465
Create a Profile View
466
Volume Render
467
Up Ramp VR Adjustments
467
Surface Rendering
468
Render Modes
468
VR Presets Screen
469
VR Settings Screen
470
VR Controls Screen
472
Display a VR Image
474
Attach/Detach Objects
475
Cut Planes
476
Work with Colors
477
Add Colors
477
Assign a Range of Colors
478
Change a Color
478
Autofit
478
Create a Multi-VR Object
479
Modify the Opacity Ramp
480
Zoom In/Out
481
Segment
482
Segment Tab
482
Scalpel Control Panel
483
Advanced Processing Panel
485
Combine Segmented Objects
487
Paint on Slices
488
Add/Remove Anatomy with Auto Select
489
Remove Floaters
489
Threshold an Image
490
Batch Film
492
Batch Types
492
Batch Protocol
492
Preview, Film, or Save a Batch
492
Film/Save Tab
493
Batch Screen
493
Save Image Screen
496
Film/Save Options Screen
497
Set up a Batch Oblique
498
Batch Film Images
499
Rotate 360° 3D Images
499
Radial Planes on 2D Views
500
Save a Curved Parallel Plane or Rotating Curve Batch
501
Chapter 17 DATA MANAGEMENT
503
Overview
503
File Manager
504
Controls Area
505
Local/Remote Exam List Selection
506
Search Box
506
Application Icons
507
Source Menu
507
Recycle bin
508
Exam List
509
Exam List Columns
509
Exam Status Column
510
Network Status Icons
510
Archive Status Icons
511
Right Mouse Options in the Exam List
511
Choosing Which Columns to Display
513
Configuring the Exam List
513
Deleting Exams
513
Sorting the Exam List
513
Changing the Order of Columns
514
Changing the Width of Columns
514
Keyboard Shortcuts
514
Performed Procedure Step (PPS)
515
PPS Column
515
Send PPS for an Exam
515
Series List
515
Deleting Series and Images
516
Sorting the Series List
516
Changing the Order of Columns
517
Changing the Width of Columns
517
Choosing Which Columns to Display
517
Configuring the Series List
517
Keyboard Shortcuts
517
Job Management Screen
519
Archive/Network
522
Configure Network Hosts Window
523
Configured Hosts List
523
Remote Host Information
524
Archive Node Settings
525
SCU and SCP Services
525
Working with Archive Nodes and Network Hosts
526
Add or Edit a Host
526
Ping a Remote Host
527
Remove Nodes from the Configuration Host List
527
Local DB Retrieve Exams, Series, or Images
527
Manually Send Exam, Series or Images
528
View the Backlog/Queue
529
Eject (Detach) Media
529
Check the Network History
530
Workarounds
530
CD, DVD and USB Interchange
531
Media Creator
532
How to Handle Cds and Dvds
534
Save Images
535
Restore Images
538
View Images on a PC
538
Remove DVD RAM Cartridge
541
Data Export
543
Compose Tab
543
Export Tab
547
Compose a Report
552
Export a Report
552
View a Report on a PC
553
Delete Items
554
Patient Data
555
Scan Data Manager
561
Locking and Unlocking Scan Data
563
Deleting Scan Data
563
Add Reconstruction
563
Save Full or Anonymized Raw Scan Data
563
Recon Management
565
Recon Management Concepts
565
General Recon Management Window
565
Suspended Entries
565
Deleting Reconstruction Jobs
566
Completed Recon Management Window
566
Reconstruction and Image Processing Task List
567
Reconstruction and Image Processing Task List Window
567
Reconstruction in the Reconstruction and Image Processing Task List
569
Adding a Recon
569
Duplicate a Recon
569
Editing/Viewing a Secondary Recon Task
570
Reformatting in the Reconstruction and Image Processing Task List
570
Selecting Viewports for Images in the Reconstruction and Image Processing Task List
570
Auto-View
571
Expanded Mode
571
Series Binding
571
Viewport Priority
571
Image Tools Column
571
Data Transfer
573
Chapter 18 PROTOCOLS
575
Overview
575
Protocols
576
Build Protocols
576
Use Protocols
576
Edit Protocols
577
View Protocols
577
System Options
577
Protocol Selection Window
577
Anatomical Selector
578
Protocol Numbers
578
Edit a Protocol
579
Add a Protocol to Favorites
581
Copy and Paste a Protocol
581
Delete a Protocol
582
Series Numbering
582
Auto Voice Management
584
Add an Auto Voice Language
584
Delete an Auto Voice Language
585
Record an Auto Voice Message
585
Delete an Auto Voice Message
586
Kv Assist Settings
588
Typical Clinical Tasks
588
Minimum and Maximum Kv
588
Image Display
588
Ma Limits
588
Build a Protocol with Kv Assist
589
Auto Gating Configuration
590
Auto Gating Workflow
590
Set up a User Profile
590
Open Auto Gating Configuration
590
Set up the HR Configuration
590
Build a Cardiac Protocol Using Auto Gating
591
Dose Reporting in Protocol Management
592
Chapter 19 ACCESS CONTROLS
593
Overview
593
Access Controls
594
Introduction
594
Users and Groups
594
Groups and Privileges
594
Open EA3
595
Configure Local Users
596
Add a Local User
597
Add a Local Group
598
Add Memberships
599
Group Restricted Fields
599
Add an Enterprise Group
600
Add or Remove a User from a Group
601
Change a User's Full Name
602
Change a User's Password
603
Prompt a User to Change Password
603
Lock or Unlock a User
604
Remove a User, Group, or Membership
604
Remove a Group
604
Remove a User
604
Remove a Membership
605
Configure EA3 Properties
605
Configure the Enterprise Tab
607
Auto Configuration
609
Manual Configuration
611
Chapter 20 SYSTEM MANAGEMENT
613
Overview
613
System Tools
614
Using Message Viewer
614
Apply Product Network Filters
615
Find Third Party Software License
616
System Preferences
617
Introduction
617
Set Viewport Preferences
618
Set Annotation Preferences
618
Set Grid
619
Set Series Binding
619
Set Tick Marks
619
Set Window Width / Window Level Presets
619
Set Protocol Selection Preferences
621
Set Patient Data Entry Preferences
622
Add Patient Data Entry Preset
622
Patient Data Entry Presets
622
Contrast
623
Delete Patient Data Entry Preset
623
Edit Patient Data Entry Preset
623
Add Contrast
624
Delete Contrast
624
Edit Contrast
624
Set Image Database Preferences
625
Set ECG Preferences
626
Set Lighting Preferences
628
Set General Preferences
629
Set Screensaver Time
629
Set the Scan Room Playback Volume
629
Set the Extended Hounsfield Units (HU)
630
Set the Patient Information Display
630
Set PPS Preferences
631
System Troubleshooting
632
Open a Unix Shell
632
Collect Data with SPR Snap
633
Use Ilinq
634
Launch Ilinq
634
Terminate Ilinq Remote Connection
634
Chapter 21 GENERAL INFORMATION
635
Introduction
635
System Components
635
Emergency Stop
635
CT Description
635
CT Operation Theory
636
X-Ray Source
636
CT Detector
636
Gantry
637
Power Distribution Unit
637
Table
637
System Cabinet
637
Scanner Desktop
637
General Information
639
Gantry Coordinate System
639
Patient Scanning
640
Network
641
Purpose of Revolution CT Scanner Connection to Network
641
Network Interface Technical Specifications
641
Network Information Flows Specifications
641
Required Characteristics and Configuration for Network Support of Revolution CT
644
Archive Node Settings
644
Remote Host Parameters
644
Scanner Specifications
644
Network Compatibility
644
Hazardous Situations Due to Failure of IT-Network
646
System Operational Modes
648
Overview
648
Scout
648
Axial
648
Cine
648
Helical
649
Cardiac Axial
649
ECG-Modulated Ma
650
ECG-Modulated Ma Theory
650
Electrocardiograph Tube Current Modulation
650
Smarttrack
651
Image Display
653
CT Number
653
Pixels
654
Pixel Coordinates
654
RAS Coordinates
655
Pixels and CT Numbers
658
Window Width
658
Window Level
658
Scout Based Attenuation Characterization
659
Appendix A OPERATOR MESSAGES
665
Operator Messages
665
Appendix B ABBREVIATIONS
675
Abbreviations
675
Appendix C UNITS of MEASURE
677
Units of Measure
677
Appendix D LEXICON
681
Lexicon
681
Scan Acquisition and User Interface Basics
682
Dose Modulation and Reduction Tools
683
Multi-Slice Detector Geometry
683
Image Reconstruction and Display
684
Contrast Media Tools
685
Multi-Planar Formats and 3D Processing
686
Service and Application Tools
686
Workflow
687
References
687
Appendix E DOSE INFORMATION REFERENCE
689
Dose Information Reference
689
Advertisement
Advertisement
Related Products
GE Responder AED
GE Venue R1
GE Venue R2
GE Responder 1000
GE RTfino/RT3200
GE Precision RXi
GE RES1072
GE Responder 2000
GE Feeder Management Relay 750
GE Hotpoint RE1440H
GE Categories
Refrigerator
Ranges
Microwave Oven
Air Conditioner
Dishwasher
More GE Manuals
Login
Sign In
OR
Sign in with Facebook
Sign in with Google
Upload manual
Upload from disk
Upload from URL