Sign In
Upload
Manuals
Brands
JVC Manuals
Camcorder
Streamcorder GY-DV300
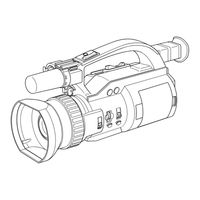
User Manuals: JVC Streamcorder GY-DV300 DV Camcorder
Manuals and User Guides for JVC Streamcorder GY-DV300 DV Camcorder. We have
5
JVC Streamcorder GY-DV300 DV Camcorder manuals available for free PDF download: Instruction Manual, Application Note
JVC Streamcorder GY-DV300 Instruction Manual (328 pages)
DV CAMCORDER
Brand:
JVC
| Category:
Camcorder
| Size: 7.01 MB
Table of Contents
English
6
Instruction Manual
1
Safety Precautions
3
Table of Contents
6
Introduction
7
Precautions for Proper Use
7
Routine and Periodical Maintenance
9
Precautions for Use of Head Cleaning Tape
10
Videocassette to be Used
10
Characteristic CCD Phenomena
11
Condensation
11
CONTROLS, INDICATORS and CONNECTORS Manual Adjustment of the Audio
12
Right Side Section
12
Rear Section
14
Left Side Section
18
Front Section
20
Top Section
21
Indications on LCD Screen and Viewfinder Screen
22
Alarm Indications
30
Menu Setting Screen
31
Preparations
32
Basic System
32
AC Operation
33
Power Supply Preparation
33
Battery Pack Operation
34
Operating Time with Battery Pack
35
Precautions for the Battery
35
Turning the Power off
37
Preparations for Operation
38
Cassette Loading
38
LCD Screen Adjustment
39
Diopter Adjustment
40
Setting, Displaying and Recording the Date and Time
41
Displaying the Time and Date on the Screen
43
Charging the Built-In Battery
44
Setting, Displaying and Recording the Time Code
45
Recording the Time Code
46
Settings before Shooting
49
Audio Input Signal Selection
49
Audio Monitor Selection
51
Focus Mode Selection
52
Angle of View (Zoom In/Zoom Out)
53
Menu Screen Settings
54
Shooting
59
Viewing the Recorded Scene (Edit Search)
59
If the Unit Is Left in Recording-Standby Mode
60
Recording the Color Bar
61
Manual Adjustments
63
Manual Focus Adjustment
63
Using ND Filter
65
Obtaining Natural Tint (White Balance)
66
Manual White Balance Adjustment
67
Manual Iris Adjustment
68
Manual Iris Adjustment
69
Manual Shutter Speed Adjustment
70
Adjusting the Shutter Speed Manually
71
Manual Gain Adjustment
72
Displaying Zebra Patterns for Adjustment
75
Manual Adjustment of the Audio Recording Level
76
Adjusting the Audio Recording Level Manually
77
Disabling Operation of the Camera-Shake Compensation Function
78
Adjusting the Quality of Camera Image
79
Playback Procedure
80
Playback
81
Blank Search
81
Adjusting the Playback Sound Volume
82
Outputting CH-3/CH-4 Channel Sound
83
Connecting a Video Component with DV Connector
84
Menu Screen
86
Camera Menu Screen
86
Top Menu Screen
86
Operation Menu Screen
86
Mode Switch
86
Menu Screen
87
Menu Screen Structure
87
Vtr Menu Screen
87
System Menu Screen
87
Setting Menu Screens
88
Contents of Menu Screens
90
TOP MENU Screen
90
SYSTEM Menu Screen
91
DISPLAY Menu Screen
94
CAMERA Menu Screen
96
OPERATION Menu Screen
98
CLOCK/TC Menu Screen
99
VTR Menu Screen
99
Alarm Indications and Actions
100
Troubleshooting
100
Tally Lamp
101
In Case of Difficulty
102
Others
104
Displaying the Hour Meter Display
104
If Dirt Penetrates into the Interior of Viewfinder
105
Installing the Ferrite Core
106
Specifications
107
Deutsch
115
Einleitung
116
Vorsichtshinweise für Richtige Verwendung
116
Laufende und Regelmäßige Wartung
118
Vorsichtshinweise für die Verwendung von Kopfreinigungsband
119
Zu Verwendende Videokassetten
119
Kondensation
120
Charakteristische CCD-Erscheinungen
120
Bedienungselemente, Anzeigen und Anschlüsse
121
Rechte Seite
121
Rückseite
123
Linke Seite
127
Vorderseite
129
Oberseite
130
Anzeige auf Flüssigkristall-Bildschirm und Sucherbildschirm
131
VORBEREITUNGEN Grundsystem
141
Vorbereitung der Stromversorgung
142
Netzbetrieb
142
Batteriepack-Betrieb
143
Anbringen eines Mikrofons (Optional)
145
Vorbereitungen für den Betrieb
146
Einschalten der Stromversorgung
146
Einlegen einer Kassette
147
Einstellung des Flüssigkristall-Bildschirms
148
Einstellen des Suchers
149
Einstellung, Anzeige und Aufzeichnung von Datum und Zeit
150
Laden der Eingebauten Batterie
153
Einstellung, Anzeige und Aufzeichnung des Zeitcodes
154
Einstellungen vor der Aufnahme
156
Wahl des Aufnahmemodus (AUTO/MANUAL)
156
Wahl des Audio-Eingangssignals
158
Audio-Monitorwahl
160
Wahl des Fokusmodus
161
Herauszoomen)
162
Menübildschirm-Einstellungen
163
Aufnahme
166
Grundlegender Aufnahmebetrieb
166
Ansehen der Aufgenommenen Szene (Editiersuche)
168
Wenn das Gerät IM Aufnahmebereitschaftsmodus Gelassen wird
169
Aufzeichnung des Farbbalkens
170
Verwendung der AE-Funktion
171
Manuelle Einstellungen
172
Manuelle Fokuseinstellung
172
Verwendung des ND-Filters
174
Erhalten einer Natürlichen Tönung (Weißabgleich)
175
Manuelle Blendeneinstellung
177
Manuelle Einstellung der Verschlusszeit
179
Manuelle Einstellung der Verschlusszeit
180
Manuelle Verstärkungseinstellung
181
Anzeige von Zebramustern für die Einstellung
184
Manuelle Einstellung des Audioaufnahmepegels
185
Ausschalten der Ausgleichsfunktion für Wackeln der Kamera
187
Einstellen der Qualität des Kamerabildes
188
Wiedergabe
189
Bandwiedergabe
189
Leerstellensuche
190
Einstellen der Wiedergabelautstärke
191
Ausgabe von CH-3-/CH-4-Kanalton
192
Externe Komponenten
193
Anschluss einer Videokomponente mit DV
193
Anschluss
193
Menübildschirm (MENU)
195
Aufbau des Menübildschirms (MENU) (Videorekorder
196
Einstellung von Menübildschirmen
197
Hauptmenübildschirm (TOP MENU)
198
Menübildschirm SYSTEM
198
Menübildschirm DISPLAY
203
Menübildschirm CAMERA (Kamera)
205
Menübildschirm OPERATION (Betrieb)
207
Menübildschirm CLOCK/TC (Uhr/Zeitcode)
208
Menübildschirm VTR (Videorekorder)
208
Störungssuche
209
Alarmanzeigen und Tätigkeiten
209
IM Störungsfall
211
Sonstiges
213
Anzeigen der Betriebsstundenanzeige
213
Wenn Schmutz in das Innere des Suchers Eintritt
214
Ferritkerninstallation
215
Technische Daten
216
Français
224
Introduction
225
Précautions D'emploi
225
Entretien Courant Et Maintenance Périodique
227
Précautions D'utilisation de la Cassette de Nettoyage
228
Cassettes VIDéo À Utiliser
228
Condensation
229
Phénomènes Propres Aux Capteurs CCD
229
Commandes, Indicateurs Et Connecteurs
230
Côté Droit
230
Partie Arrière
232
Côté Gauche
236
Partie Avant
238
Partie Supérieure
239
Indicateurs Figurant Sur L'écran LCD Et Dans Le Viseur
240
PRÉPARATIFS Configuration de Base
250
Alimentation Électrique
251
Fonctionnement Sur Secteur
251
Fonctionnement Sur Batterie
252
Raccordement D'un Microphone Externe (en Option)
254
Mise en Œuvre
255
Mise Sous Tension
255
Mise Hors Tension
255
Chargement D'une Cassette
256
Réglage de L'écran LCD
257
Réglage du Viseur
258
Réglage, Affichage Et Enregistrement de la Date Et de L'heure
259
Recharge de la Batterie Intégrée
262
Réglage, Affichage Et Enregistrement du Code Temporel
263
Réglages de Prise de Vues
265
Sélection du Mode de Prise de Vues (Automatique/Manuel)
265
Sélection du Signal D'entrée Audio
267
Sélection du Signal Audio Contrôlé
269
Sélection du Mode de Mise Au Point
270
Utilisation du Zoom
271
Réglages de Menu
272
Prise de Vues
275
Procédure de Base
275
Contrôle de la Séquence Enregistrée (Edit Search)
277
Maintien de L'appareil en Mode Attente D'enregistrement
278
Enregistrement de la Mire des Couleurs
279
Utilisation de la Fonction AE (Calcul D'exposition Automatique)
280
Réglages Manuels
281
Mise Au Point Manuelle
281
Utilisation du Filtre ND
283
Obtention de Couleurs Naturelles (Balance des Blancs)
284
Réglage Manuel D'ouverture
286
Réglage Manuel de la Vitesse D'obturation
288
Réglage Manuel du Gain
290
Affichage D'une Mire Zébrée Pour Réglage de Luminosité
293
Réglage Manuel du Niveau Audio
294
Désactivation de la Fonction de Stabilisation Optique
296
Lecture
298
Lecture D'une Cassette
298
Recherche D'une Plage Vide
299
Réglage du Volume Sonore
300
Reproduction du Son des Canaux
301
Raccordements Externes
302
Raccordement D'un Appareil VIDéo Par Le Connecteur DV
302
Écrans de MENU
304
Organisation des Écrans de MENU
304
(Mode Prise de Vues)
304
Menu System
305
Organisation des Écrans de MENU (Mode Magnétoscope/Signal DV)
305
Menus de Réglage
306
Menu Principal TOP MENU
306
Menu Principal TOP MENU
307
Magnétoscope/Signal DV)
308
Menu de Réglage de L'écran Et du Viseur (DISPLAY)
312
Menu CAMERA
314
Menu OPERATION
316
Menu de Réglage de L'horloge Et du Code Temporel (CLOCK/TC)
317
Menu des Fonctions Magnétoscopes (VTR)
317
Dépannage
318
Messages D'alerte
318
En Cas de Difficulté
320
Divers
322
Affichage du Compteur Horaire
322
Si de la Poussière Pénètre À L'intérieur du Viseur
323
Installant la Noyau de Ferrite
324
Caractéristiques Techniques
325
Advertisement
JVC Streamcorder GY-DV300 Instruction Manual (110 pages)
DV CAMCORDER
Brand:
JVC
| Category:
Camcorder
| Size: 5.22 MB
Table of Contents
Instruction Manual
1
Important Safeguards
2
Safety Precautions
3
Main Features
5
Table of Contents
6
Precautions for Proper Use
7
Routine and Periodical Maintenance
9
Precautions for Use of Head Cleaning Tape
10
Videocassette to be Used
10
Condensation
11
Characteristic CCD Phenomena
11
Right Side Section
12
Rear Section
14
Left Side Section
18
Front Section
20
Top Section
21
Indications on LCD Screen and Viewfinder Screen
22
Alarm Indications
30
Menu Setting Screen
31
Basic System
32
Power Supply Preparation
33
AC Operation
33
Battery Pack Operation
34
Operating Time with Battery Pack
35
Precautions for the Battery
35
Turning the Power on
37
Cassette Loading
38
LCD Screen Adjustment
39
Diopter Adjustment
40
Setting, Displaying and Recording the Date and Time
41
Displaying the Time and Date on the Screen
43
Charging the Built-In Battery
44
Setting, Displaying and Recording the Time Code
45
Recording the Time Code
46
Shooting Mode (AUTO/MANUAL) Selection
47
Audio Input Signal Selection
49
Audio Monitor Selection
51
Focus Mode Selection
52
Angle of View (Zoom In/Zoom Out)
53
Shooting
54
Menu Screen Settings
54
Shooting
56
Basic Recording Operation
57
Viewing the Recorded Scene (Edit Search)
59
If the Unit Is Left in Recording-Standby Mode
60
Recording the Color Bar
61
Manual Focus Adjustment
63
Using ND Filter
65
Obtaining Natural Tint (White Balance)
66
Manual White Balance Adjustment
67
Manual Iris Adjustment
68
Manual Iris Adjustment
69
Manual Shutter Speed Adjustment
70
Adjusting the Shutter Speed Manually
71
Manual Gain Adjustment
72
Displaying Zebra Patterns for Adjustment
75
Manual Adjustment of the Audio Recording Level
76
Adjusting the Audio Recording Level Manually
77
Disabling Operation of the Camera-Shake Compensation Function
78
Adjusting the Quality of Camera Image
79
Playback of Tape
80
Blank Search
81
Adjusting the Playback Sound Volume
82
Outputting CH-3/CH-4 Channel Sound
83
Connecting a Video Component with DV Connector
84
MENU Screen Structure
86
Menu Screen Structure
87
System Menu Screen
87
Setting Menu Screens
88
Top Menu Screen
89
TOP MENU Screen
90
Contents of Menu Screens
90
SYSTEM Menu Screen
91
DISPLAY Menu Screen
94
CAMERA Menu Screen
96
OPERATION Menu Screen
98
CLOCK/TC Menu Screen
99
VTR Menu Screen
99
Alarm Indications and Actions
100
Tally Lamp
101
In Case of Difficulty
102
Displaying the Hour Meter Display
104
If Dirt Penetrates into the Interior of Viewfinder
105
Installing the Ferrite Core
106
Specifications
107
JVC Streamcorder GY-DV300 Instruction Manual (109 pages)
DV CAMCORDER
Brand:
JVC
| Category:
Camcorder
| Size: 2.06 MB
Advertisement
JVC Streamcorder GY-DV300 Instruction Manual (57 pages)
DV CAMCORDER
Brand:
JVC
| Category:
Camcorder
| Size: 2.05 MB
JVC Streamcorder GY-DV300 Application Note (2 pages)
KA-DV300/350 Network Pack and accessory cards Installation
Brand:
JVC
| Category:
Camcorder
| Size: 0.57 MB
Table of Contents
Objective
1
What You Need
1
Attaching the Network Pack to the Camera
1
Inserting Accessory Card
2
Notes
2
Advertisement
Related Products
JVC GY-DV300REM - Remote Controllable Dv Camcorder
JVC GY-DV301
Jvc Streamcorder GY-DV300E
Jvc Streamcorder GY-DV301E
JVC GY-DV300U - 1/3" 3-ccd Dv Camcorder
JVC GY-DV5000U - 3-ccd Professional Dv Camcorder
JVC GY-DV500U - Professional Dv Camcorder
JVC GY-DV500E - Pal Professional Dv Camcorder
JVC GY-DV5001
JVC GY-DV550
JVC Categories
Car Receiver
Camcorder
TV
VCR
Stereo System
More JVC Manuals
Login
Sign In
OR
Sign in with Facebook
Sign in with Google
Upload manual
Upload from disk
Upload from URL