Sign In
Upload
Manuals
Brands
Siemens Manuals
Recording Equipment
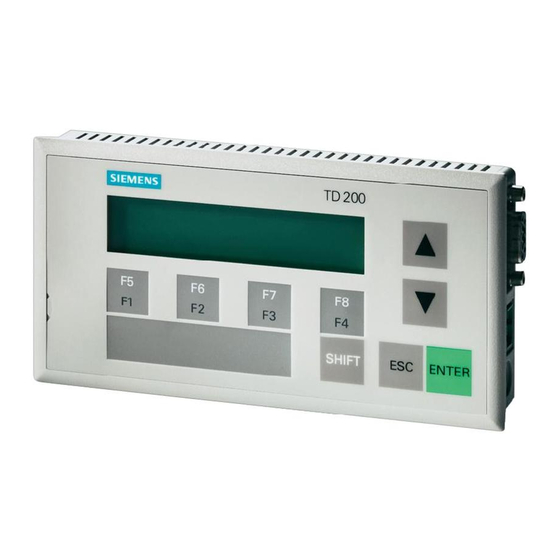
SIMATIC TD 200
Siemens SIMATIC TD 200 Manuals
Manuals and User Guides for Siemens SIMATIC TD 200. We have
2
Siemens SIMATIC TD 200 manuals available for free PDF download: User Manual
Siemens SIMATIC TD 200 User Manual (106 pages)
Operator Interface
Brand:
Siemens
| Category:
Recording Equipment
| Size: 0.77 MB
Table of Contents
Table of Contents
5
1 Product Overview and Installation
11
Chapter Overview
11
Hardware Features
12
Components of the TD 200
12
Major Components of the TD
12
Components of the TD
12
TD 200 Keyboard Features
13
Description of Command Keys
13
Description of Function Keys
13
Installing the TD 200
14
Preparing the Mounting Surface
14
Preparing the TD 200 for Mounting
14
Mounting Surface Hole Dimensions
14
Removing the Three Mounting Screws
14
Mounting the TD 200
15
Positioning Spacers
15
Connecting the Communication Cable
16
Installing Cable for One-To-One Communication
16
Installing a Multiple CPU Network
16
One-To-One Configuration
16
Connecting a Power Cable
17
Supplying Power from the S7-200 CPU
17
Supplying Power from an External Power Supply
17
Supplying Power with the TD/CPU Cable
17
Supplying Power Using an External Power Supply
17
2 Configuring the TD 200
19
Chapter Overview
19
Starting the STEP 7-Micro/Win TD 200 Configuration Wizard
20
Accessing the TD 200 Configuration Wizard
20
Selecting Language and Bar Graph Character Set
21
Wizard: Language and Character Set
21
Enabling Time-Of-Day, Force Function, and Password Protection
22
Specifying Function Key Memory Bits and Display Update Rate
22
Wizard: Time-Of-Day Clock, Force I/O, and Password Protection
22
Bits Set by each Function Key
23
Wizard: Function Key Memory Bits and Update Rate
23
Selecting Message Size and Number of Messages
24
Wizard: Message Size and Number of Messages
24
Specifying Parameter Block Address, Message Enable Address, and Message Location
25
Wizard: Block Address, Enable Flags, and Message Location
25
Creating a Text-Only Message
26
Wizard: 40-Character Message
26
Embedding Data Values in a Text Message
27
Wizard: Embedding Variable Data Value in a Message
28
Formatting the Embedded Data Value
29
TD 200 Message: Creating a Word Embedded Data
29
Wizard: Embedded Data Value Place Holder in Message
30
Embedded Data: Making the Data Editable and Password Protected
31
Wizard: Completed Second Message
31
Creating a Message that Requires Acknowledgement
32
Wizard: Embedding Data to Require Acknowledgement
32
Embedded Data: Requiring Acknowledgement of Message
33
Wizard: Message Requires Acknowledgement
34
Viewing the TD 200 Parameter Block and Messages
35
Data Block Editor Showing a Sample TD 200 Parameter Block
35
Creating a Sample Program
36
Sample Program in the Ladder and Statement List Editors
37
3 Operating the TD 200
39
Chapter Overview
39
Using the Display Message Mode
40
Functions Available
40
Scrolling through Messages
40
Display Message Mode
40
Editing a Value
41
Acknowledging a Message
42
Using the Menu Mode
43
Menus Available
43
Selecting Menu Options
43
Exiting Menu Mode
43
Menu Mode
43
Viewing Messages
44
Accessing the Menu
44
Viewing CPU Status Menu
45
Accessing the Menu
45
Viewing Fatal and Non-Fatal Errors
45
Fatal Error Messages
46
Non-Fatal Error Messages
46
Forcing I/O
47
Accessing the Menu
47
Entering a Password
48
Correcting a Password
48
Incorrect Password Display
48
Selecting a Force I/O Option
49
Force I/O Menu Display
49
Forcing and Unforcing an I/O Point
50
Changing the Force Status of an I/O Point
50
Setting Time and Date in the CPU
51
Accessing the Menu
51
No Clock in CPU Display
51
Editing the Time and Date
52
Releasing the Password
53
Restoring the Password Protection
53
Using the TD 200 Setup Menu Option
54
Setting the Network Address of the TD 200
54
Selecting the CPU Address
55
Entering the Parameter Block Address
56
Selecting the Baud Rate
57
4 Creating Sample Programs
59
Chapter Overview
59
Using a Text Message to Create a Clock for a CPU
60
Creating a Sample Program
60
Using the STEP 7-Micro/Win TD 200 Configuration Wizard
60
Accessing the TD 200 Configuration Wizard
60
Data Block of the Clock Message
61
Sample Program for Creating a Clock
62
Using the Bar Graph Character Set
63
Data Block of the Bar Graph Sample Program
63
Sample Program for Creating a Bar Graph
65
Specifications and Reference
67
Chapter Overview
67
Specifications for Model Number 6ES7 272-0AA00-0YA0
68
ASCII Characters
69
ASCII Characters for the TD
69
A.2 ASCII Characters
69
ALT Key Combinations for International and Special Characters
70
Multiple CPU Configurations
71
Chapter Overview
71
Configuring for Multiple CPU Communication
71
A Typical Multiple CPU Network
72
B.1 Configuring for Multiple CPU Communication
72
Building a TD/CPU Cable
74
Making a Cable that Supplies Power to the
74
Making a Cable that Does Not Supply Power to the
74
TD/CPU Cable with Power Connections
74
TD/CPU Cable Without Power Connections
74
Troubleshooting
75
Troubleshooting Table
75
C-1 Troubleshooting Table
75
TD 200 Parameters and Messages
77
Software Support for Configuring a
77
Chapter Overview
77
TD 200 Parameter Block
77
Understanding How Messages Are Displayed
78
Understanding How the TD 200 Uses the Parameter Block
78
Displaying Different Messages on Two TD 200 Units
78
Description of the Parameter Block Format
79
TD 200 Parameter Block
79
Building the Parameter Block
80
Parameter Block ID Bytes 0 and 1
80
TD 200 Configuration Bytes 2 and 3
80
Information Contained in Byte 2 of the TD 200 Parameter Block
80
Number of Messages Byte 4
81
Information Contained in Byte 3 of the TD 200 Parameter Block
81
Prioritizing Messages
82
M Area Address Byte 5
82
Message-Enable Bits for up to 80 Messages
82
Message Address Bytes 6 and 7
83
Message-Enable Address Bytes 8 and 9
83
Bits Set by each Function Key
83
Edit Password Byte 10 and 11 (Optional
84
Formatting Messages
85
Twenty-Character Message Format
85
D.3 Formatting Messages
85
Forty-Character Message Format
86
Embedding Data Values in a Text Message
87
Data Value Format Options
87
Format Word Usage
87
Defining the Data Value Format
88
Acknowledgement Bit 0
88
Bit Values of the Format Word
88
Acknowledgement Bit of Byte 0 of the Format Word
88
Acknowledge-Notification Bit 1
89
Acknowledge-Notification Bit of Byte 0 of the Format Word
89
Edit-Notification Bit 2
90
Sample Program for Using the Acknowledge-Notification Bit
90
Edit-Notification Bit of Byte 0 of the Format Word
90
Sample Program for Using the Edit-Notification Bit
91
Password Protection Bit 3
92
Edit-Allowed Bit 4
92
Password Protection Bit of Byte 0 of the Format Word
92
Edit-Allowed Bit of Byte 0 of the Format Word
92
Data Size/Format, and Decimal Bits 0, 1, 2 and
93
Bit Values of Byte 1 of the Format Word
93
Required Display Characters for each Display Format
95
Understanding Message Types
96
No Acknowledgement, no Edits Allowed
96
Acknowledgement, no Edits Allowed
96
No Acknowledgement, Edits Allowed
96
Acknowledgement, Edits Allowed
97
Editing Variables with the TD
98
Acknowledging and Editing a Message
98
D.6 Editing Variables with the TD 200
98
Aborting an Edit
99
Advertisement
siemens SIMATIC TD 200 User Manual (132 pages)
Operator Interface
Brand:
siemens
| Category:
Control Panel
| Size: 1.23 MB
Table of Contents
Edition
2
Table of Contents
7
1 Product Overview and Installation
11
Hardware Features
12
Components of the TD 200
12
TD 200 Keyboard Features
13
Customizing the TD 200 Keyboard
14
Installing the TD 200
16
Preparing the Mounting Surface
16
Preparing the TD 200 for Mounting
16
Installing the TD
16
Mounting the TD 200
17
Connecting the Communication Cable
18
Installing Cable for One-To-One Communication
18
Installing a Multiple CPU Network
18
Connecting a Power Cable
19
Supplying Power from the S7-200 CPU
19
Supplying Power from an External Power Supply
19
Removing the Protective Film from the TD 200
20
Cleaning the Device
21
2 Configuring the TD 200
23
Starting the STEP 7-Micro/Win TD 200 Configuration Wizard
24
Selecting Language and Character Set
25
Enabling Time-Of-Day, Force Function, and Password Protection
27
Specifying Function Key Memory Bits and Display Update Rate
28
Selecting Message Size and Number of Messages
29
Specifying Parameter Block Address, Message Enable Address, and Message Location
30
Creating a Text-Only Message
31
Embedding Data Values in a Text Message
32
Formatting the Embedded Data Value
34
Creating a Message that Requires Acknowledgement
37
Viewing the TD 200 Parameter Block and Messages
40
Creating a Sample Program
41
Using the Chinese Character Set
43
3 Operating the TD 200
45
Using the Display Message Mode
46
Functions Available
46
Scrolling through Messages
46
Editing a Value
47
Acknowledging a Message
48
Using the Menu Mode
49
Menus Available
49
Selecting Menu Options
49
Exiting Menu Mode
49
Viewing Messages
50
Accessing the Menu
50
Viewing CPU Status Menu
51
Accessing the Menu
51
Viewing Fatal and Non-Fatal Errors
51
Fatal Error Messages
52
Non-Fatal Error Messages
52
Forcing I/O
53
Accessing the Menu
53
Entering a Password
54
Correcting a Password
54
Selecting a Force I/O Option
55
Forcing and Unforcing an I/O Point
56
Setting Time and Date in the CPU
57
Accessing the Menu
57
Editing the Time and Date
58
Releasing the Password
59
Restoring the Password Protection
59
Using the TD 200 Setup Menu Option
60
Setting the Network Address of the TD 200
60
Selecting the CPU Address
61
Entering the Parameter Block Address
62
Selecting the Baud Rate
63
Setting the Highest Station Address
64
Selecting the GAP Factor
65
Adjusting the Display Contrast
66
4 Creating Sample Programs
67
Using a Text Message to Create a Clock for a CPU
68
Creating a Sample Program
68
Using the STEP 7-Micro/Win TD 200 Configuration Wizard
68
Using the Bar Graph Character Set
71
Specifications and Reference
74
Certificates, Directives and Declarations
74
Notes on the CE Symbol
74
EMC Directive
74
Low Voltage Directive
74
Declaration of Conformity
74
Observing the Setup Guidelines
74
A.2 Approvals for USA, Canada and Australia
75
FM Approval Notes
75
Technical Specifications
76
A.3 Technical Specifications
76
TD 200 Original Character Set
78
ALT Key Combinations for International and Special Characters
79
A.5 ALT Key Combinations for International and Special Characters for the TD 200 Original Character Set
79
TD 200 Latin1 Character Set
80
TD 200 Cyrillic Character Set
81
TD 200 Simplified Chinese Character Set
82
Multiple CPU Configurations
85
Configuring for Multiple CPU Communication
86
Building a TD/CPU Cable
88
Making a Cable that Supplies Power to the
88
Making a Cable that Does Not Supply Power to the
88
Network Connectors
89
Cable for a PROFIBUS Network
90
Network Repeaters
91
CPU Grounding and Circuit Reference Point Guidelines for Using Isolated Circuits
92
Troubleshooting
95
TD 200 Parameters and Messages
97
TD 200 Parameter Block
97
Understanding How Messages Are Displayed
98
Understanding How the TD 200 Uses the Parameter Block
98
Description of the Parameter Block Format
99
Building the Parameter Block
100
Parameter Block ID Bytes 0 and 1
100
TD 200 Configuration Bytes 2 and 3
100
Number of Messages Byte 4
102
Prioritizing Messages
102
M Area Address Byte 5
103
Message Address Bytes 6 and 7
104
Message-Enable Address Bytes 8 and 9
104
Edit Password Bytes 10 and 11 (Optional
105
Character Set Selection Bytes 12 and 13 (Optional
105
Formatting Messages
106
Twenty-Character Message Format
106
D.3 Formatting Messages
106
Forty-Character Message Format
107
Embedding Data Values in a Text Message
108
Data Value Format Options
108
Defining the Data Value Format
109
Acknowledgement Bit 0
109
Acknowledge-Notification Bit 1
110
Edit-Notification Bit 2
111
Password Protection Bit 3
113
Edit-Allowed Bit 4
113
Data Size/Format, and Decimal Bits 0, 1, 2 and
114
Understanding Message Types
117
No Acknowledgement, no Edits Allowed
117
Acknowledgement, no Edits Allowed
117
No Acknowledgement, Edits Allowed
118
Acknowledgement, Edits Allowed
118
Editing Variables with the TD
119
Acknowledging and Editing a Message
119
D.6 Editing Variables with the TD 200
119
Aborting an Edit
120
Modifying a TD 200 Configuration
121
Types of TD 200 Configurations
122
TD 200 Configuration Created Using STEP 7-Micro/Win Version 3.1
122
Other Configurations
122
Using STEP 7-Micro/Win (Version 3.1 or Greater
122
E.2 Using STEP 7–Micro/Win (Prior to Version 3.1)
123
E.3 Using STEP 7–Micro/Win (Version 3.1 or Greater)
125
Index
127
Advertisement
Related Products
Siemens SIMATIC Distributed I/O System DP/ASi Link
Siemens SIMATIC KTP400 Basic
Siemens SIMATIC KTP600 Basic
Siemens SIMATIC KTP1000 Basic
Siemens SIMATIC KTP1500 Basic
Siemens SIMATIC HMI Mobile Panel 277 RO
Siemens SIMATIC RTLS4040T
Siemens SIMATIC NET CP 5613
Siemens SIMATIC NET CP 5614
Siemens SIMATIC NET DP/AS-i Link 20E
Siemens Categories
Industrial Equipment
Controller
Control Unit
Oven
Washer
More Siemens Manuals
Login
Sign In
OR
Sign in with Facebook
Sign in with Google
Upload manual
Upload from disk
Upload from URL