Table of Contents
Advertisement
INSTRUCTION MANUAL
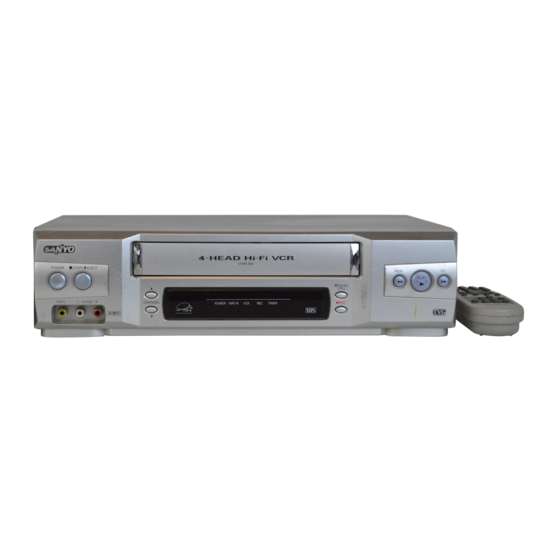
Video Cassette Recorder
Only cassettes marked
can be used with this video cassette recorder.
As an E
S
®
Partner,
NERGY
TAR
SANYO has determined that
this product or product model
meets the E
S
NERGY
TAR
guidelines for energy efficiency.
Please read this manual carefully before connecting your VCR and operating it for the first time.
Keep the manual in a safe place for future reference.
®
VWM-800
English
Advertisement
Table of Contents

Summary of Contents for Sanyo VWM-800
- Page 1 Only cassettes marked can be used with this video cassette recorder. As an E ® Partner, NERGY SANYO has determined that this product or product model meets the E ® NERGY guidelines for energy efficiency. Please read this manual carefully before connecting your VCR and operating it for the first time.
- Page 2 The serial number is found on the back of this unit. This number is unique to this unit and not available to others. You should record requested information here and retain this guide as a permanent record of your purchase. Model No. VWM-800 Serial No.
-
Page 3: Important Safety Instructions
IMPORTANT SAFETY INSTRUCTIONS CAUTION: PLEASE READ AND OBSERVE ALL WARNINGS AND INSTRUCTIONS IN THIS OWNER’S MANUAL. AND THOSE MARKED ON THE PRODUCT. RETAIN THIS BOOKLET FOR FUTURE REFERENCE. This product has been designed and manufactured to assure personal safety. Improper use can result in electric shock or fire hazard. -
Page 4: Control Names And Locations
CONTROL NAMES AND REMOTE CONTROL LOCATIONS POWER EJECT FRONT NUMBER buttons TV/VCR SLOW Ad JUMP POWER STOP/ CASSETTE PLAY PLAY INPUT EJECT COMPARTMENT SP/SLP CLEAR PAUSE STOP D D E E F F G G arrows MENU TV CONTROL buttons ENTER VIDEO IN/ CHANNEL... -
Page 5: Installation
INSTALLATION ANTENNA TO VCR CONNECTIONS Placing your VCR on the top of or under the TV receiver Disconnect the antenna leads from the rear of the TV receiver. may result in interference appearing on the TV screen Identify the type of cable from your antenna. If it is a round when the VCR is on. -
Page 6: On-Screen Display (Osd)
ONSCREEN DISPLAY (OSD) EASY INFORMATION If the Extended Data Service (XDS) signals are provided Some of these functions will be displayed every time the along with normal TV signal in your area or during play- VCR is operated. back of a tape recorded with Extended Data Service (XDS) signals, the station ID, program title and program details are shown in the TV screen. -
Page 7: Setting The Setup Menu
SETTING THE SETUP MENU CHANNEL SELECTION This VCR is equipped with a frequency synthesized tuner Press MENU and the MAIN menu will appear. capable of receiving up to 181 channels. These include Press to select the SETUP menu, then press VHF channels 2-13, UHF channels 14-69 and CATV ENTER. -
Page 8: Setting The Clock
SETTING THE CLOCK MANUAL CLOCK SET Example: July 5, 2003 ; 2:15 AM The VCR gives you two ways to set the time and date: the Press MENU and the MAIN menu will appear. Auto Clock Feature or manually. The Auto Clock Feature Press to choose the CLOCK menu. - Page 9 SETTING THE TVG ® (TVGuardian ® TVG WORD SETS In addition to the main TVG modes, three additional sets TVGuardian ® Technology embedded into the VCR will of words are available to the user to selectively turn on or filter foul language from pre-recorded movies which have off.
-
Page 10: Normal Playback
NORMAL PLAYBACK TO WATCH A STILL (or Frame Advance) PICTURE PREPARATION During PLAYBACK mode... • Turn on the TV. Press PAUSE or PAUSE/STILL on the front panel. • Be sure the TV is set to the VCR Output Channel (CH 3 or 4). Still picture will appear on the TV screen. -
Page 11: Timer Recording
TIMER RECORDING AUTO POWER SHUT-OFF FUNCTION This feature is especially helpful when you finish watching a tape. Press STOP, REW, and POWER. The VCR will This VCR can be programmed to record up to 8 programs rewind the tape and turn itself off automatically. within a period of 1 year. -
Page 12: Program Priority
Press to choose the SPEED item. Press to choose the desired tape speed (AUTO, SP or SLP). Example: SP • The AUTO mode determines how much tape is left and switches speed from SP to SLP, if necessary, to complete recording the program. -
Page 13: Checking The Recording Time
CHECKING THE RECORDING TIME VHS Hi-Fi STEREO SYSTEM/ Press REC once to check the recording time. The recalled MTS BROADCAST setting will automatically return to the TV screen after 6 seconds. This VCR is equipped with the VHS Hi-Fi audio sound system for recording and playback. -
Page 14: Editing A Recording
MULTICHANNEL TV SOUND INDICATOR COUNTER MEMORY FUNCTION (MTS) This is useful if there is a section of tape you want to view immediately after recording or if you want to return to the Shows Onscreen as illustrated below when ENTER is same point several times. -
Page 15: Troubleshooting
TROUBLESHOOTING SPECIFICATIONS Cassette cannot be inserted. GENERAL • Load cassette in direction indicated by arrow on cassette. Head System • A cassette is already in the VCR. Four head helical scan azimuth system • Check if POWER indicator is lit on the VCR indicator panel. If Power Source not, make sure power cord is plugged in. - Page 16 Acts of God, or normal wear and tear. The foregoing is in lieu of all other express warranties and SANYO does not assume or authorize any party to assume for it any other obli- gation or liability.


