Advertisement
Advertisement
Table of Contents

Summary of Contents for Huawei SmartAX MA5675
-
Page 1: Quick Start
SmartAX MA5675 Multi-service Access Module Quick Start... - Page 2 Security Warning and Precautions To use the device properly and safely, read the safety precautions carefully before using the device and strictly observe these precautions when using the device. Do not look directly into the optical port without eye protection. ...
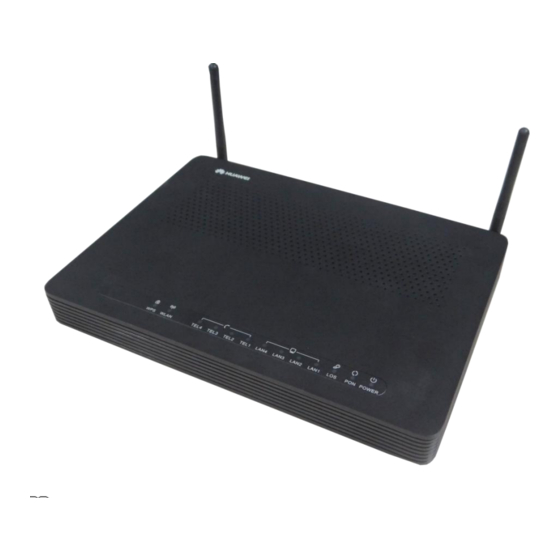
- Page 3 Appearance The appearance of the MA5675 is as follows: MA5675 dose not support USB and BBU port. The figures shown in this document may differ from the actual porduct, but the difference does not affect the functions of the product.
-
Page 4: Installation Procedure
Installing the MA5675 Installation Procedure MA5675 can be placed on a horizontal workbench or mounted onto a wall horizontally. The methods for mounting the MA5675 onto a wall are the same. The procedure is as follows: Step 1 Mark the positions of two holes (with a spacing listed in the following table) used for mounting a MA5675. -
Page 5: Connecting Cables
Connecting Cables Cable Connections Between the MA5675 and Other Devices... -
Page 6: Logging In To The Web Page
Refer to the preceding cable connections of each product and select the following corresponding steps to connect the MA5675. Step 1 Use an optical fiber to connect the OPTICAL port on the MA5675 to the optical port in the wall. The optical connector connected to the OPTICAL port is SC/UPC. - Page 7 Configuring Wi-Fi Parameters Step 1 Step 1 Choose the WLAN tab and choose WLAN Configuration. Step 2 Step 2 In the pane, select the Enable WLAN option box. In the dialog box that is displayed, set the basic Wi-Fi parameters, including the SSID, authentication mode, and encryption mode.
-
Page 8: Description Of Leds
Description of LEDs Table 7-1 LED status indications 1 Status Description POWER Green: always on The device is powered on. The power supply is cut off. See Table 7-2. See Table 7-2. Always on The Ethernet connection is in LAN1~LAN4 the normal state. - Page 9 PON and LOS are GPON LEDs. The status of PON and LOS reflects the connection between MA5675 and the optical line terminal (OLT). The following table describes the status of the PON and LOS LEDs. Table 7-2 LED status indications 2 LED Status Description The MA5675 is disabled by the...
-
Page 10: Technical Specifications
defaults and reset the MA5675. If the indicator is off and then is lit, the system restarts successfully. Technical Specifications Item Specifications Dimensions (L x W x H) 268 mm x 213 mm x 34 mm Weight (including the power adapter) About 800 g Power supply 11 - 14 V DC, 2 A... -
Page 11: Warranty Card
Warranty Card Thank you for choosing Huawei Technologies Co., Ltd. To get better services, please read this warranty card carefully, fill in the required information, and preserve this card in good condition. PERSONAL OR COMPANY FULL NAME Address/Postal Code Telephone Number... -
Page 12: Limited Warranty
In any case that is not covered by this limited warranty or should the warranty expire, Huawei shall charge for the service(s) claimed for the products if the product is still remediable. Huawei preserves the right for interpretation of this limited warranty. - Page 13 No part of this document may be reproduced or transmitted in any form or by any means without prior written consent of Huawei Technologies Co., Ltd. Trademarks and Permissions and other Huawei trademarks are trademarks of Huawei Technologies Co., Ltd. All other trademarks and trade names mentioned in this document are the property of their respective holders.


