Table of Contents
Advertisement
Quick Links
Advertisement
Table of Contents

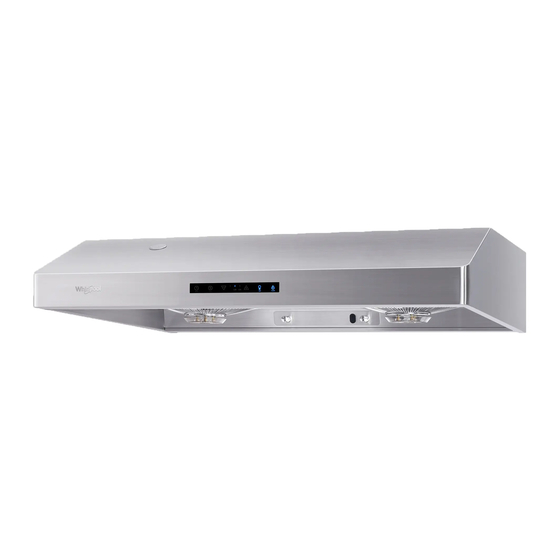
Summary of Contents for Whirlpool HAS2831S
- Page 1 Model 產品型號:HAS2831S...
-
Page 3: Table Of Contents
Warning ................1 Before using the hood & Installation ......2 Procedure ............... 3 Mounting method ............4 Hood Operation .............. 5 Maintenance & Cleaning ..........7 Hood measurement ............8 Others & Specifications ..........9 Wiring diagram ............... 10 警告... -
Page 4: Warning
ARNING Important: For safety purpose, you should read the instructions carefully before using the appliance for the first time. Save the instruction for future reference. The appliance is designed for domestic use and may only be installed and operated in accordance with these instructions for use. **Remove the protection film outside the hood before installation. -
Page 5: Before Using The Hood & Installation
EFORE SING • Packing materials (plastic bags, polystyrene, etc.) must be kept out of children’s reach, as they are potentially dangerous. • Installation must be carried out by a qualified technician. • Check the voltage on the rating plate which should correspond to the voltage in your home. -
Page 6: Procedure
ROCEDURE 1. Find a suitable installation position of hood which Plywood should be next to a window and can be cut to let Exhaust the exhaust duct pass through. duct 2. If the exhaust duct has to pass through the wall, particular attention must be paid to the structure of the wall as steel reinforcement may be embedded. -
Page 7: Mounting Method
OUNTING ETHOD Rear mounting (2 brackets are pre-installed) Use 2 screws (If it is not wooden wall, please use anchor.) and 2 washers to secure the hood to the wall. 696mm FIG.1 Top mounting Use 4 wooden screws and 4 washers to secure the hood to the bottom of the cabinet. -
Page 8: Hood Operation
PERATION On/Off (1) Press to power on the fan and press again to turn off. Light Switch (1) Press this button to turn on and off the light. (2) The light is operated independently and not controlled by On/Off button. Fan Speed Up (1) Press this button to increase the fan speed from 1→2→3. - Page 9 PERATION (d) Dirty oil water flows into the built-in oil cup as shown in the picture (Fig. C). Oil Cup Fig. C (e) To avoid excessive water to spillover from the oil cup, please take down the oil cup and clean up the water inside after every cleaning as shown in the Remove Oil Cup...
-
Page 10: Maintenance & Cleaning
& C AINTENANCE LEANING Always disconnect from power supply before cleaning. 2. Regularly to clean the hood for long lasting. 3. Fan protection grille can be detached for cleaning by removing the screws with a screwdriver. lt must be reinstalled after cleaned. 4. -
Page 11: Hood Measurement
EASUREMENT unit:mm... -
Page 12: Others & Specifications
5. Do not directly flame the range hood. 6. During installation, power supply must be disconnected. 7. Rubber cushion (at rear housing) MUST NOT be removed, otherwise appliance will be operated unstable/noisy and water leakage. Specifications HAS2831S Model 15 KGs Net Weight 17.8 KGs... -
Page 13: Wiring Diagram
IRING IAGRAM CIRCUIT DIAGRAM Model: HAS2831S Voltage 220-240VAC 50Hz WHITE BLACK Power consumption Lamp: LED 5W Max. FUSE 15A Fan: 145W Heater: 520W UART Serial No. AAE Temper- Float LIGHT BAR ature Sensor Line Date of mfr. REMARKS:CAPACITOR 2.5uf 450V AC*2 FIT AC220-240V 50Hz... - Page 14 警 告 重要說明 為安全起見,初次使用產品前請先細閱本說明書,並保存本說明書, 以便作參考之用。 本產品只供家居使用,請必須依照本說明書內的指示安裝及操作。 **安裝前請先撕除抽油煙機機箱外的保護膠膜。 1. 請依照本說明書內的指示安裝及操作。 2. 維修抽油煙機前,請務必切斷電源。 3. 維修抽油煙機時,請戴上橡膠手套。 4. 請勿直接噴水在抽油煙機上。 5. 當與易燃氣體一起使用時,廚房請保持良好的通風,以避免危險。 6. 不可在抽油煙機下方直接燃燒。 7. 請勿與其他易燃氣體共用排氣通道。 8. 孩童不可玩耍此抽油煙機。且不可在無人監督下操作此抽油煙機。 9. 若未依此說明書執行清潔可能產生危險或引起火災。 10. 不可在抽油煙機下方點燃酒精等易燃物品。 11. 警告:在煮食過程部份零配件有可能會變燙 。 12. 排出的油煙不得藉由瓦斯或其他燃料之排氣通道釋出。 13. 排出的油煙程序需符合相關的排放空氣法規。 14. 若電源線損壞,請勿操作抽油煙機。必須由製造廠或服務處或具 有類似資格的技術人員更換以避免危險。 15. 不可使用此抽油煙機的人:生理、感官或心智能力不足(包括兒童), 或缺乏相關經驗和知識。除非他們是在被監督或有其他具相關訓 練的人員指導下方可使用。...
-
Page 15: 安裝前檢查 & 安裝守則
安裝前檢查 • 包裝材料(如:塑膠袋、發泡膠等)有潛在性的危險請勿讓孩童接觸。 • 請由受過專業訓練的技術人員進行安裝。 • 安裝前請確認規格線路標籤上所列示的電壓符合您家的電壓。 • 安裝前請接上電源,檢查照明、摩打及開關是否正常。 • 安裝前檢查下列附件: a. 風管圈 (6”轉 6” 1個、6”轉5” 1個) b. 小油盤2個 c. 水壺1個 d. 保證卡1張、說明書1本 e. 螺絲包1組 (6#*1½”木螺釘6支、墊片6個、3/16”*1/4” 螺絲4支、圓型海綿墊2個) 安裝守則 (1) 周圍環境 抽油煙機安裝位置如在窗上或附近有太多門 • 窗,請再開動抽油煙機前先關閉門窗。 建議油煙上升至25厘米以上,抽油煙機始能 • 充份發揮抽油煙效果。 (2) 安裝高度和機體位置 抽油煙機安裝高度,自本機底板至瓦斯爐面 • 之距離以700±50毫米為最理想。... -
Page 16: 安裝注意事項
安裝注意事項 1. 排氣管的理想安裝位置為於爐台正對窗戶安裝, 合 排氣管 可敲下一方玻璃,安裝一塊穿有彎管孔大的合 板 板,排氣管由此孔穿出,絕不損壞壁面。 2. 若排風管為鑽穿牆洞,鑽洞時應要留意牆壁結 構和質料,切勿破壞牆洞以外之壁面。 3. 在壁面畫好鑽洞範圍,再使用電鑽鑽穿牆壁。 4. 在已選定的安裝位置上,釘上螺絲釘。 3毫米(最大之距離) 毫米 5. 調整機體兩側之掛鈎(吊鐵),將機體懸掛於螺 絲釘上。 6. 先量好彎管正對牆面位置,釘頭與牆壁間最 螺絲釘 多保持3毫米距離,作掛鈎之用此舉有助機身 牆壁 保持水平。 7. 懸掛後,機體要保持一定水平。 8. 照已選好排氣管的適當位置,選擇適當長度的 直管進行裝設。 9. 機體前後請調整2-4毫米的斜度固定機體,以 水 平 保持油槽運行方向順暢。 注意: 請勿移除機身後方的海綿墊,此為防震 用,若移除有可能產生運作不穩定、異音和 漏水現象。 傾... -
Page 17: 吊掛方式
吊掛方式 (1) 後吊掛-掛牆(吊掛片為預鎖) 使用兩支木螺絲(如果牆身物料並非木材,請使用爆炸螺絲)及兩個 墊片將抽油煙機固定於牆壁上。 696mm 圖 一 (2) 上吊掛 使用四支螺絲及四個墊片,將抽油煙機固定於櫥櫃下方。先將四支 螺絲鎖在櫥櫃下方,再將抽油煙機扣上螺絲後,將四支螺絲鎖緊, 並確認抽油煙機牢固且不會移動(見圖二)。 在抽油煙機頂部兩端黏貼圖型海綿墊(見圖三)。 (注意: 必須確認抽油煙機已牢固且不能移動,否則抽油煙機會有下塌風險) 圖二 圖 三... -
Page 18: 功能簡介
功能簡介 電源開/關按 鍵 (1) 按一次開啟電源,再按一次關閉電源。 照明按鍵 (1) 按一次開啟照明,再按一次關閉照明。 (2) 此按鍵獨立控制,不受電源開/關按鍵所影響。 風速加速按 鍵 (1) 風速上調至高速為止,每按一次則速度遞增從1→2→3。 (2) 當每次開啟電源開/關按鍵,油煙機會以上一次關機前的風速啟動。 風速 減速按鍵 (1) 風速下調至低速為止,每按一次則速度遞減3→2→1。 (2) 當每次開啟電源開/關按鍵,油煙機會以上一次關機前的風速啟動。 蒸汽清洗 (1) 蒸汽清洗步驟: (a) 使用提供水壺(如圖示A),每次加水,請加水到水壺指示 圖 A 的水位線。如超越水位線水量,水會由油杯溢出到地 注水口 上。請勿加入任何清潔劑入水壺,以免損壞抽油煙機。 (b) 把注水口的蓋向左或右方向移動(如圖示B),然後將 水壺的水倒入住水口。 圖 B (c) 按下蒸汽清洗鍵啟動清洗程序,蒸汽清洗鍵的燈亮起, 整個蒸汽清洗程序約6-8分鐘,當清洗過程結束,蒸汽 清洗鍵的燈熄滅。... - Page 19 功能簡介 (2) 當水位過低,顯示屏上“LW”燈會不停閃亮,提示加水 以繼續清洗程 序。當加水以後,“LW”燈會自動熄滅。如一直未有加水,即使關機 後,顯示屏上“LW”燈仍會閃亮,客人可選擇拔掉插頭,“LW”燈的閃 爍提示會自動消失。 (3) 油煙機設有清洗提示,當累積操作15小時後,顯示屏上“CR”燈會不停 閃亮,提示客人要進行清洗,當按下蒸汽清洗鍵啟動清洗程序後, “CR”燈會自動熄滅。如一直未有啓動清洗程序,即使關機後,顯示屏上 “CR”燈仍會閃亮,客人可選擇拔掉插頭,“CR”燈的閃爍提示會自動消 失。客人亦可因應煮食的情況而增加蒸汽清洗的次數,令抽油煙機更耐用。 (4) 於蒸汽清洗進行中,可隨時按電源開/關鍵按鍵終止清洗程序。 延遲關機按鍵 (1) 按一下此鍵啟動延遲關機功能,維持現有風速,啟動計時5分鐘, 然後自動關機。 (2) 運轉中途可變換風速。 (3) 運轉途可隨時按電源開/關按鍵終止延遲關機功能。 注意:(1)初次進行蒸汽清洗,因水泵及水管未有進水,清洗過程會有明顯水泵 聲音,這是正常現象。 (2)實際蒸汽清洗時間,有機會受到環境溫度影響。 (3)蒸汽清洗過程中,切勿用手觸摸機身和蒸汽,以免被燙傷。...
-
Page 20: 保養與清潔
保養與清潔 1. 清潔前,務必要切斷電源。 2. 定期清潔抽油煙機,可以保持抽油煙機壽命。 3. 使用螺絲起子可拆卸風扇保護網的螺絲取下保 護網進行清洗。完成後,必須重新裝回原位。 4. 按逆時針方向旋轉可取下保護網的小油盤進 行清潔。 完成後,按順時針方向旋轉,即可 拆卸 重新裝回。 5. 抽油煙機的小油盤可拆卸作定期清潔。 安裝 6. 在開啟煮食爐前,請先開啟抽油煙機,以免 廚房溫度過高。 右轉裝置 左轉拆卸... -
Page 21: 油機尺寸
油機尺寸 單位:mm... -
Page 22: 注意事項及警告標示 & 性能規格表
2. 排出的氣體不得藉由瓦斯或其他燃料之排氣通道釋出。 3. 當抽油煙機與瓦斯或其他燃料同時使用時,室內應有良好的通風。 4. 若未依說明書持行清潔或操作可能產生危險或可能引起火災。 5. 不可在抽油煙機下方直接燃燒。 6. 安裝抽油煙機前,務必先切斷電源。 7. 請勿移除機身後方的海綿墊,此為防震用,若移除有可能產生運作 不穩定、異音和漏水現象。 性 能 規 格 表 型號 HAS2831S 淨重 15 千克 毛重 17.8 千克 照明 最大5W LED燈條 機種尺寸 寬 710 x 深 520 x 高 165 毫米 包裝尺寸... -
Page 23: 線路圖
線路圖 CIRCUIT DIAGRAM Model: HAS2831S Voltage 220-240VAC 50Hz WHITE BLACK Power consumption Lamp: LED 5W Max. FUSE 15A Fan: 145W Heater: 520W UART Serial No. AAE Temper- Float LIGHT BAR ature Sensor Line Date of mfr. REMARKS:CAPACITOR 2.5uf 450V AC*2 FIT AC220-240V 50Hz...


