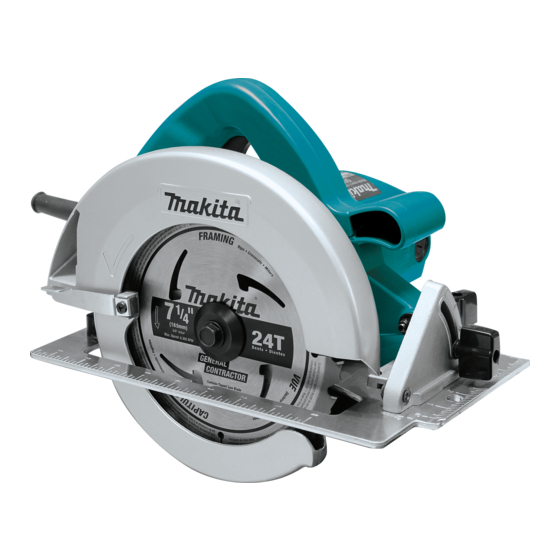
Makita 5007F Instruction Manual
185 mm (7-1/4”) circular saw
Hide thumbs
Also See for 5007F:
- Instruction manual (29 pages) ,
- Technical information (12 pages) ,
- Instruction manual (17 pages)
Table of Contents
Advertisement
Circular Saw
185 mm (7-1/4")
MODEL 5007F
185 mm (7-1/4")
MODEL 5007FA
Equipped with Electric Blade Brake
I N S T R U C T I O N
WARNING:
For your personal safety, READ and UNDERSTAND before using.
SAVE THESE INSTRUCTIONS FOR FUTURE REFERENCE.
w w w . m a k i t a t o o l s . c o m
DOUBLE
INSULATION
M A N U A L
001307
Advertisement
Table of Contents

Summary of Contents for Makita 5007F
-
Page 1: Circular Saw
Circular Saw 185 mm (7-1/4”) MODEL 5007F 185 mm (7-1/4”) MODEL 5007FA Equipped with Electric Blade Brake I N S T R U C T I O N WARNING: For your personal safety, READ and UNDERSTAND before using. SAVE THESE INSTRUCTIONS FOR FUTURE REFERENCE. -
Page 2: Specifications
If the plug does not fit fully in the outlet, reverse the plug. If it still does not fit, contact a qualified elec- trician to install a polarized outlet. Do not 5007F/5007FA 185 mm (7-1/4”) 60 mm (2-3/8”) 46 mm (1-3/4”) 5,800/min. -
Page 3: Personal Safety
change the plug in any way. Double insula- tion eliminates the need for the three wire grounded power cord and grounded power supply system. 5. Avoid body contact with grounded sur- faces such as pipes, radiators, ranges and refrigerators. There is an increased risk of electric shock if your body is grounded. -
Page 4: Specific Safety Rules
Not More Than SPECIFIC SAFETY RULES DO NOT let comfort or familiarity with product (gained from repeated use) replace strict adherence to circular saw safety rules. If you use this tool unsafely or incorrectly, you can suffer serious personal injury. - Page 5 close instantly. Never clamp or tie the lower guard into the open position. If saw is accidentally dropped, lower guard may be bent. Raise the lower guard with the Retract- ing Lever and make sure it moves freely and does not touch the blade or any other part, in all angles and depths of cut.
- Page 6 When restarting a saw in the workpiece, center the saw blade in the kerf and check that saw teeth are not engaged into the material. If saw blade is binding, it may walk up or KICKBACK from the workpiece as the saw is restarted.
- Page 7 DO NOT TRY TO HOLD SHORT PIECES BY HAND! Fig. 5 Fig. 6 17. Never attempt to saw with the circular saw held upside down in a vise. This is extremely dangerous and can lead to seri- ous accidents.
- Page 8 SAVE THESE INSTRUCTIONS WARNING: MISUSE or failure to follow the safety rules stated in this instruction manual may cause serious personal injury. SYMBOLS The followings show the symbols used for tool. V ... volts A ... amperes ... alternating or direct current ...no load speed ˚...
-
Page 9: Functional Description
FUNCTIONAL DESCRIPTION 001340 1. Depth guide 2. Lever 001357 1. Bevel scale plate 2. Clamping screw 001374 1. Base CAUTION: • Always be sure that the tool is switched off and unplugged before adjusting or checking function on the tool. Adjusting depth of cut CAUTION: •... - Page 10 Be sure the blade is installed with teeth pointing up at the front of the tool. • Use only the Makita wrench to install or remove the blade. To remove the blade, press the shaft lock so that the blade cannot revolve and use the wrench to loosen the hex bolt counterclockwise.
-
Page 11: Operation
001434 1. Saw blade 2. Hex bolt 3. Outer flange 4. Inner flange OPERATION 001460 1. Rear handle 2. Front grip 3. Base To install the blade, follow the removal procedure in reverse. BE SURE TO TIGHTEN THE HEX BOLT CLOCKWISE SECURELY. -
Page 12: Maintenance
001480 1. Rip fence(Guide rule) MAINTENANCE 001496 1. Adjusting screw 2. Base 001505 1. Triangular 001145 1. Limit mark Rip fence (Guide rule) The handy rip fence allows you to do extra-accurate straight cuts. Simply slide the rip fence up snugly against the side of the workpiece and secure it in position with the screw on the front of the base. - Page 13 CAUTION: • These accessories or attachments are recommended for use with your Makita tool specified in this manual. The use of any other accessories or attachments might present a risk of injury to persons. Only use accessory or attachment for its stated purpose.
- Page 14 Memo...
- Page 15 Memo...
- Page 16 Memo...
- Page 17 First-Class Postage Required Post Office will not deliver without proper postage. Makita U.S.A., Inc. 14930 Northam Street La Mirada, CA 90638-5753 Fold...
- Page 18 Paste 3. How did you learn about this product: Magazine From Dealer Newspaper Store Display Catalog 4. Most favored points are: Design Features Size Price Makita Brand MODEL NO. YEAR SERIAL NO. PHONE 20-29 30-39 40-49 Paste Paste Radio Exhibition...
-
Page 19: Factory Service Centers
Date Purchased When you need service: Send complete tool (prepaid) to one Dealer’s Name & Address of the Makita Factory Service Centers listed, or to an Authorized Makita Service Center. Be sure to attach a letter to the outside of Model No. -
Page 20: Warranty Policy
MAKITA LIMITED ONE YEAR WARRANTY Warranty Policy Every Makita tool is thoroughly inspected and tested before leaving the factory. It is warranted to be free of defects from workmanship and materials for the period of ONE YEAR from the date of original purchase.


