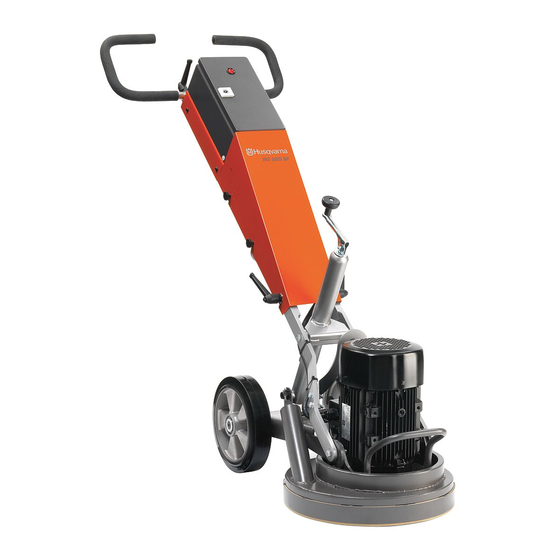
Husqvarna PG 400SF Operator's Manual
Grinder
Hide thumbs
Also See for PG 400SF:
- Operator's manual (68 pages) ,
- Price list (48 pages) ,
- Operator's manual (76 pages)
Table of Contents
Advertisement
Operator's manual
US
Please read the operator's manual carefully and make sure
you understand the instructions before using the machine.
Manuel d'utilisation
FR
Lire attentivement et bien assimiler le manuel d'utilisation
avant d'utiliser la machine.
Manual de
ES
instrucciones
Lea detenidamente el manual de instrucciones y asegúrese de
entender su contenido antes de utilizar la máquina.
PG 400SF
PG 280 SF
HUSQVARNA CONSTRUCTION PRODUCTS
US FR ES
Advertisement
Table of Contents

Summary of Contents for Husqvarna PG 400SF
- Page 1 Operator’s manual Please read the operator’s manual carefully and make sure you understand the instructions before using the machine. Manuel d’utilisation PG 400SF Lire attentivement et bien assimiler le manuel d’utilisation avant d’utiliser la machine. Manual de PG 280 SF instrucciones Lea detenidamente el manual de instrucciones y asegúrese de...
-
Page 2: Key To Symbols
KEY TO SYMBOLS Symbols on the machine: Symbols in the operator’s manual: WARNING! The machine can be a Inspection and/or maintenance should be dangerous tool if used incorrectly or carried out with the motor switched off and carelessly, which can cause serious or the plug disconnected. -
Page 3: Table Of Contents
CONTENTS Contents KEY TO SYMBOLS Symbols on the machine: ..........Symbols in the operator’s manual: ....... CONTENTS Contents ..............WHAT IS WHAT? What is what on the grinder? ........SAFETY INSTRUCTIONS Before using a new grinder .......... Personal protective equipment ........General safety precautions .......... -
Page 4: What Is What
WHAT IS WHAT? What is what on the grinder? 1 Electric box 11 Screws, cover 2 Cover 12 Grinding unit - PG 280 SF 3 Crank for adjusing grinding pressure 13 Grinding unit - PG 400 SF 4 Lifting eye 14 Handle / handlebar 5 Engine 15 Control Panel... -
Page 5: Safety Instructions
Let your Husqvarna dealer regularly check the machine and make essential adjustments and repairs. All information and all data in the Operator’s Manual were •... -
Page 6: General Safety Precautions
SAFETY INSTRUCTIONS General safety precautions Personal safety WARNING! Overexposure to vibration can WARNING! This section describes basic lead to circulatory damage or nerve damage safety directions for using the machine. This in people who have impaired circulation. information is never a substitute for Contact your doctor if you experience professional skills and experience. - Page 7 SAFETY INSTRUCTIONS Use and care • Only use the machine for the purpose it was intended for. • Keep all parts in good working order and ensure that all fixtures are properly tightened. • Never use a machine that is faulty. Carry out the checks, maintenance and service instructions described in this manual.
-
Page 8: Assembly
Have a set of gloves ready, as diamond tools can get very hot. 1 Crank up the handlebar to the highest position. It is highly recommended to use the Husqvarna DC 3300 dust extraction system for complete dust control. Make sure that the filters in the vacuum cleaner are intact and clean. -
Page 9: Grinding Guide
GRINDING GUIDE Diamonds • Pressure. • Hardness of bond. Background • Diamond grit size. Diamond abrasives usually consist of 2 components: • Number of segments under the machine. 1 Diamond powder (also known as diamond crystals or grit). • Adding an additional abrasive (e.g. sand, silicone carbide) By changing the size of the diamond powder or grit, we on the floor will increase wear. -
Page 10: Diamond Selection
GRINDING GUIDE Diamond selection They way diamond segments are set-up on the grinding unit will greatly influence the performance of the machine, the productivity levels and also the finished floor quality. There are a number of different diamond configurations that can be achieved on both the PG 400 SF and PG 280 SF. Metal bond diamonds Full set - inner and outer row Full set - outer row... - Page 11 GRINDING GUIDE Select the correct metal bond diamonds for your application The following suggestion cover the basic configurations for metal bonded diamond tools. Full set - Full set - Half set - inner Half set - Applications Metal bond Grit size inner and outer row and outer row...
- Page 12 GRINDING GUIDE Resin bond diamonds Redi Lock resin attachment adaptor Full set - outer row Half set - outer row Selecting the correct resin bond diamond configuration for your application Applications Full set - outer row Half set - outer row Polishing terrazzo/stone tiles Resurfacing terrazzo/stone tiles Surface polishing of concrete floors - Hard concrete...
-
Page 13: Starting And Stopping
STARTING AND STOPPING Before starting Starting • Position grinder on the working area. • Reduce the pressure between grinding disc and floor by pushing down the handle until the disc rises a bit. • Make sure there are diamonds beneath the machine and that they are firmly attached. -
Page 14: Maintenance
MAINTENANCE Faults and trouble shooting Maintenance The machine will not run Check the power supply and the power cables and make sure that they are not damaged. IMPORTANT! Inspection and/or maintenance should be Check that the emergency stop button is not pressed by carried out with the motor switched off and the plug turning it clockwise. -
Page 15: Technical Data
TECHNICAL DATA Technical data PG 400 SF PG 280 SF PG 280 SF (Single-phase) Motor Power, kW/hp 4/5,4 2,2/3,0 Rated current, A 12,9 Rated voltage, V Weight, kg/lbs 115/254 70/154 70/154 Grinding width, mm/inch 400/16 280/11 280/11 Grinding pressure, kg/lbs 65/143 35/77 35/77... -
Page 16: Us Warranty Statement
EQUIPMENT Equipment manufactured by Husqvarna is warranted to be free from manufacturing defects in normal service for a period of two (2) years from date of purchase by the original consumer purchaser. Component manufacturers offer separate warranty periods. - Page 17 www.husqvarnacp.com 1151254-95 2008-08-21 ´®z+S9Q¶5Y¨ ´®z+S9Q¶5Y¨...


