Sign In
Upload
Manuals
Brands
Bosch Manuals
Sander
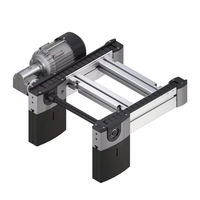
Rexroth BS 2/C-250
Bosch Rexroth BS 2/C-250 Belt sections Manuals
Manuals and User Guides for Bosch Rexroth BS 2/C-250 Belt sections. We have
2
Bosch Rexroth BS 2/C-250 Belt sections manuals available for free PDF download: Assembly Instructions Manual
Bosch Rexroth BS 2/C-250 Assembly Instructions Manual (84 pages)
Brand:
Bosch
| Category:
Industrial Equipment
| Size: 23.56 MB
Table of Contents
Table of Contents
3
About this Documentation
6
Validity of the Documentation
6
Required and Supplementary Documentation
6
Presentation of Information
6
Safety Instructions
6
Symbols
7
Designations
8
Abbreviations
8
Safety Instructions
8
About this Chapter
8
Intended Use
8
Improper Use
9
Personnel Qualifi Cations
9
General Safety Instructions
9
Product-Specifi C Safety Instructions
10
Personal Protective Equipment
11
Owner Responsibilities
11
General Notes on Property and Product Damage
11
Scope of Delivery
13
Condition on Delivery
13
About this Product
13
Specifi Cations
13
Using Belt Section BS 2
13
Design of Belt Section BS
13
Product Description
14
Identifi Cation of the Product
15
Transport and Storage
15
Transporting the Product
15
Storing the Product
15
Assembly
16
Unpacking
16
Installation Requirements
16
Installation Position
16
Required Tools
16
Required Accessories
17
Symbols Used
18
Assembling the Product
19
Installing the Belt Section on Leg Sets
19
Modifying the Mounting Position of the Motor-Gear Combination or the Gear Motor
21
Bs 2/C-100
22
Disassembling the Protective Case
22
Bs 2/C-100
23
Installing the Belt Section between Two Sections
23
BS 2/C-H, BS 2/R-H, BS 2/R-V+ 1200: Installing the Belt Section between Two Sections
24
BS 2/R-H, BS 2/R-V+ 1200, Reversible: Installing the Belt Section between Two Sections
25
Bs 2/C-100
26
Assembling Two Belt Sections Drive Head-To-Return Unit
26
Bs 2/C-H, Bs 2/R-H, Bs 2/R-V+ 1200
27
Assembling Two Belt Sections Drive Head-To-Return Unit
27
Scanning the Chain Length with Sensor: BS 2/C-100
28
Scanning the Chain Length with Sensor: BS 2/C-H, BS 2/R-H, BS 2/R-V+ 1200
29
Assembling the Acceleration Element (Only for L WT = 160/240)
31
Electrical Connection of the Product
33
Commissioning
36
Initial Commissioning
36
Residual Risks
38
Re-Commissioning after a Standstill
39
Operation
39
Information on Operation
39
Wear
39
Measures to Reduce Wear
39
Loading the Workpiece Pallet
40
Environmental Factors
40
Maintenance and Repair
40
Cleaning and Care
42
Inspection
42
Conveyor Chain (Fl at Top Chain / Accumulation Roller Chain)
42
Maintenance
42
Bearings
42
Gear
42
Motor
42
Conveyor Chain (Fl at Top Chain / Accumulation Roller Chain)
43
Possibilities to Lubricate the Conveyor Chain Manually
44
LU 2 Automatic Lubrication Unit
45
Replacing Wear Parts
46
Designations
46
Required Tools
46
Required Accessories
46
Bs 2/C-100
47
Assembly Instructions: Finding a Chain Lock with an Operable Chain
48
Assembly Instructions: Fixing the Chain Tensioner at
49
Assembly Instructions: Fixing the Chain Tensioner at BS 2/C-H, BS 2/R-H, BS 2/R-V+ 1200
49
Detecting the Chain Length at
50
Detecting the Chain Length at BS 2/C-H, BS 2/R-H, BS 2/R-V+ 1200
50
Motor Mounting (MA) = R/L
51
Shortening the Conveyor Chain: BS 2/C-100, BS 2/R-300, Motor Mounting (MA) = M
53
Shortening the Conveyor Chain: BS 2/C-H, BS 2/R-H, BS 2/R-V+ 1200, Motor Mounting (MA) = R/L
55
Shortening the Conveyor Chain: BS 2/R-H, BS 2/R-V+ 1200, Reversible, Motor Mounting (MA) = R/L
57
Assembly Instructions: Changing Chain and Wear Parts
59
Assembly Instructions: Running Direction of Chain
61
Assembly Instructions: Lubricating Points
61
Changing the Conveyor Chain: BS 2/C-100
62
Changing the Conveyor Chain: BS 2/C-100, BS 2/R-300, Motor Mounting (MA) = M
64
Changing the Conveyor Chain: BS 2/C-H, BS 2/R-H, BS 2/R-V+ 1200, Motor Mounting (MA) = R/L
67
Changing the Conveyor Chain: BS 2/R-H, BS 2/R-V+ 1200, Reversible, Motor Mounting (MA) = R/L
70
Changing the Connection Belt Roller / Connection Toothed Belt: BS 2/C-H, BS 2/R-H, BS 2/R-V+ 1200, Motor Mounting (MA) = R/L
72
Motor Mounting (MA) = R/L
73
Replacing the Motor And/Or Gear BS 2/C-100, BS 2/R-300, Motor Mounting (MA) = M
74
Replacing the Gear Motor: BS 2/C-H, BS 2/R-H, BS 2/R-V+ 1200
75
Motor Mounting (MA) = R/L
75
Replacing the Gear Motor: BS 2/C-H, BS 2/R-H, BS 2/R-V+ 1200, Motor Mounting (MA) = M
76
Changing the Glide Profi Les
77
Bs 2/C-100
77
Bs 2/R-300
79
Spare Parts
81
Decommissioning
81
Disassembly and Replacement
81
Preparing the Product for Storage/Later Use
81
Disposal
82
Upgrading and Modifi Cation
82
Troubleshooting
82
Technical Data
83
Ambient Conditions
83
Advertisement
Bosch Rexroth BS 2/C-250 Assembly Instructions Manual (76 pages)
Belt sections
Brand:
Bosch
| Category:
Sander
| Size: 14.62 MB
Table of Contents
Table of Contents
3
1 About this Documentation
6
Contents
6
Presentation of Information
6
Required and Supplementary Documentation
6
Safety Instructions
6
Scope of Documentation
6
Symbols
7
Abbreviations
8
About this Chapter
8
Designations
8
Intended Use
8
2 Notes on Safety
8
Improper Use
9
Personnel Qualifi Cations
9
General Safety Instructions
10
Product-Specifi C Safety Instructions
10
Obligations of the System Owner
11
Personal Protective Equipment
11
3 General Notes on Equipment and Product Damage
12
4 Scope of Delivery
13
Product Description
14
Product Identifi Cation
15
Storing the Product
15
5 About this Product
13
BS 2 Belt Section Application
13
BS 2 Belt Section Version
13
Condition on Delivery
13
Performance Description
13
6 Transport and Storage
15
Transporting the Product
15
7 Assembly
16
Installation Requirements
16
Mounting Orientation
16
Mounting with T-Bolts
16
Required Tools
16
Unpacking
16
Required Accessories
17
Symbols Used
18
Assembling the Belt Section on Leg Sets
19
Assembling the Product
19
Changing the Mounting Position of the Motor/Gear Combination or the Gear Motor
21
BS 2/C-100, -250, BS 2/R-300, -700, BS 4/R-300, -700: Assembling the Belt Section between Two Sections
22
BS 2/C-H, BS 2/R-H, BS 4/R-V-1200: Assembling the Belt Section between Two Sections
23
BS 2/R-H, Reversible: Assembling the Belt Section between Two Sections
24
BS 2/C-100, -250, BS 2/R-300, -700, BS 4/R-300, -700: Assembling Two Belt Sections, Drive Head to Return Unit
25
Assembling Two Belt Sections, Drive Head to Return Unit
26
Bs 2/C-H, Bs 2/R-H, Bs 4/R-V-1200
26
Checking the Chain Elongation BS 2/C-100, -250, BS 2/R-300, -700, BS 4/R-300, -700
27
Checking the Chain Elongation BS 2/C-H, BS 2/R-H, BS 4/R-V-1200
28
BS 2/R-300, -700, BS 4/R-300, -700: Assembling the Accelerating Element (Only if L = 160/240)
29
Electrically Connecting the Product
31
8 Commissioning
33
Commissioning for the Fi Rst Time
33
Recommissioning after Shutdowns
34
Residual Hazards
34
Measures to Reduce Wear
35
Notes on Operation
35
9 Operation
35
Wear
35
Ambient Infl Uences
36
Loading the Workpiece Pallet
36
10 Maintenance and Repair
37
Bearings
38
Cleaning and Care
38
Conveyor Chain (Fl at Top Chain/Accumulation Roller Chain)
38
Gears
38
Inspection
38
Maintenance
38
Motor
38
Conveyor Chain (Fl at Top Chain/Accumulation Roller Chain)
39
Options to Lubricate the Conveyor Chain Manually
40
LU 2 Automatic Lubrication Unit
41
Designations
42
Replacing Wear Parts
42
Required Accessories
42
Required Tools
42
Notes for Mounting: Finding the Master Link on a Functional Chain
43
Notes for Mounting: Securing the Chain Tensioner for
44
Notes for Mounting: Securing the Chain Tensioner for BS 2/C-H, BS 2/R-H, BS 2/R-V-1200
44
Checking the Chain Elongation for
45
Checking the Chain Elongation for BS 2/C-H, BS 2/R-H, BS 2/R-V-1200
45
Shortening the Conveyor Chain: BS 2/C-100, BS 2/R-300, BS 4/R-300, BS 2/C-250, BS 2/R-700, BS 4/R-700 Motor Mounting (MA) = R/L
46
Shorten Conveyor Chain: BS 2/C-100, BS 2/R-300, BS 4/R-300, Motor Mounting (MA) = M
48
Shortening the Conveyor Chain: BS 2/C-H, BS 2/R-H, BS 2/R-V-1200, Motor Mounting (MA) = R/L
50
Shortening the Conveyor Chain: BS 2/R-H, Reversible, BS 2/R-V, Reversible, Motor Mounting (MA) = R/L
52
Notes for Mounting: Exchanging the Chain and Wear Parts
54
Notes for Mounting: Direction of Movement of the Chain
56
Notes for Mounting: Lubrication Points
56
Exchanging the Conveyor Chain
57
BS 2/C-250, BS 2/R-700, BS 4/R-700, Motor Mounting (MA) = R/L
57
Exchanging the Conveyor Chain: BS 2/C-100, BS 2/R-300, BS 4/R-300 Motor Mounting (MA) = M
59
Exchanging the Conveyor Chain: BS 2/C-H, BS 2/R-H, BS 2/R-V-1200, Motor Mounting (MA) = R/L
62
Exchanging the Conveyor Chain: BS 2/R-H, Reversible, BS 2/R-V, Reversible, Motor Mounting (MA) = R/L
65
Exchanging the Relief Roller/Connection Roller Toothed Belt
67
BS 2/C-H, BS 2/R-H, BS 2/R-V-1200, Motor Mounting (MA) = R/L
67
Exchanging the Motor And/Or Gear
68
BS 2/C-100, BS 2/R-300, BS 4/R-300, Motor Mounting (MA) = M
69
Exchanging the Motor And/Or Gear: BS 2/C-100, BS 2/R-300, BS 4/R-300, Motor Mounting (MA) = R/L
68
Exchanging the Gear Motor
70
BS 2/C-H, BS 2/R-H, BS 2/R-V-1200, Motor Mounting (MA) = M
71
Exchanging the Gear Motor: BS 2/C-H, BS 2/R-H, BS 2/R-V-1200, Motor Mounting (MA) = R/L
70
Exchanging the Glide Profi Les
72
Bs 2/C-100, Bs 2/C-250, Bs 2/C-H
72
11 Decommissioning
73
12 Disassembly and Exchange
73
Preparing the Product for Storage/Further Use
73
Spare Parts
73
13 Disposal
74
14 Extension and Conversion
74
15 Troubleshooting and Resolution
74
Ambient Conditions
75
16 Technical Data
75
Advertisement
Related Products
Bosch Rexroth BS 2/C Series
Bosch Rexroth BS 2/R-700
Bosch Rexroth BS 2/R-H
Bosch Rexroth BS 2/C-H
Bosch Rexroth BS 2/R-V-1200
Bosch Rexroth BS 2/R-300
Bosch Rexroth BS 2/C-100
Bosch Rexroth BS 4/R-300
Bosch Rexroth BS 4/R-700
Bosch BSROS20VSK
Bosch Categories
Dishwasher
Washer
Oven
Power Tool
Dryer
More Bosch Manuals
Login
Sign In
OR
Sign in with Facebook
Sign in with Google
Upload manual
Upload from disk
Upload from URL