Sign In
Upload
Manuals
Brands
Honeywell Manuals
DVR
HREP4
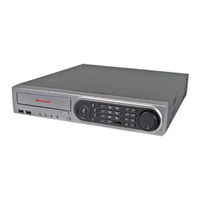
Honeywell HREP4 Digital Video Recorder Manuals
Manuals and User Guides for Honeywell HREP4 Digital Video Recorder. We have
1
Honeywell HREP4 Digital Video Recorder manual available for free PDF download: User Manual
Honeywell HREP4 User Manual (104 pages)
4, 8, 16 Channel Models Color Digital Video Recorder
Brand:
Honeywell
| Category:
DVR
| Size: 1.54 MB
Table of Contents
Table of Contents
5
Figures
7
Tables
11
About this Document
13
Overview of Contents
13
Cautions and Warnings
13
FCC Compliance Statement
14
Manufacturer's Declaration of Conformance
14
North America
14
Europe
14
EN55022 Class a Notice
15
Important Safety Instructions
15
Warranty and Service
16
Typographical Conventions
16
1 Introduction
19
Before You Install
19
Features
19
Typical System Setup
21
Figure 1-1 Typical System Setup
21
2 Installation
23
Front Panel Description
23
Figure 2-1 Front Panel
23
Table 2-1 Front Panel Description
23
Rear Panel Description
25
Figure 2-2 Rear Panel
25
Table 2-2 Rear Panel Description
25
Remote Control
26
Figure 2-3 Remote Control Description
26
Returning to the Original ID Settings
27
Setting the DVR ID Using the Remote Control
27
DVR Operation
27
Making the Connections
27
Powering up the DVR
27
Logging on
28
Figure 2-4 Startup Screen
28
Figure 2-5 Log on Screen
28
Figure 2-6 Default Display
29
Figure 2-7 Control Bar
29
Live Display
30
Controlling PTZ Cameras
30
Figure 2-8 Display Popup Menu
30
Using Digital Zoom
31
Figure 2-9 PTZ Window
31
Figure 2-10 Example of the Digital Zoom
31
Viewing the Log
32
Panic Recording
32
Using the Quick Menu
32
Figure 2-11 Log Window
32
Figure 2-12 Quick Menu
33
Table 2-3 Quick Menu
33
System Setup
34
Configuring the Camera
34
Figure 2-13 SETUP Window
34
Figure 2-14 MAIN Menu Window
34
Figure 2-15 Camera Setup Window
35
Figure 2-16 COLOR SETUP Menu
36
Figure 2-17 Example of Configuring the Color Setup Window
36
Figure 2-18 PTZ SETUP Menu
37
Figure 2-19 PTZ Property Window
37
Figure 2-20 PTZ Window
38
Figure 2-21 PTZ Parameter Window
39
Figure 2-22 PTZ TOUR Window
39
Configuring the Display
40
Figure 2-23 Motion Sensor Menu
40
Figure 2-24 Configuring the Motion Sensor Area
40
Figure 2-25 DISPLAY Window
41
Figure 2-26 DISPLAY MONITOR Menu
42
Figure 2-27 SEQUENCE Menu
43
Figure 2-28 Add Sequence Window
43
Figure 2-29 Sequence Window
44
Figure 2-30 SEQUENCE SETUP Window
44
Figure 2-31 Sequence EDIT Window
45
Figure 2-32 Sequence Window
45
Figure 2-33 Sequence EDIT Window
45
Figure 2-34 SPOT out Menu
46
Figure 2-35 SPOT-OUT Edit Window
46
Configuring Sound Settings
47
Figure 2-36 Spot Sequence Setup Window
47
Figure 2-37 Sound Window
47
Configuring System Settings
48
Figure 2-38 System Setup Window
48
Figure 2-39 System Management Window
49
Figure 2-40 SYSTEM INFORMATION Window
49
Figure 2-41 Firmware Upgrade Window
50
Configuring the Users
51
Figure 2-42 CONTROL DEVICE Menu
51
Figure 2-43 USER Setup Window
52
Figure 2-44 Edit User Window
52
Figure 2-45 Add User Window
53
Configuring the Network Settings
54
Figure 2-46 USER AUTHORITY Menu
54
Figure 2-47 LOG out Menu
54
Figure 2-48 IP NETWORK Setup Window
55
Figure 2-49 DDNS Setup Window
56
Configuring for E-Mail Notifications
57
Figure 2-50 E-MAIL Setup Menu
57
Configuring Event/Sensor Settings
58
Figure 2-51 EVENT/SENSOR Setup Window
58
Figure 2-52 ALARM INPUT Setup Menu
59
Figure 2-53 ALARM OUTPUT Setup Menu
59
Configuring Buzzer out Settings
60
Figure 2-54 BUZZER out Setup Menu
61
Figure 2-55 E-MAIL NOTIFICATION Setup Menu
62
Configuring Disk Management Settings
63
Figure 2-56 DISK MANAGEMENT Setup Window
63
Record Setup
64
Configuring the Recording Behavior of Your DVR
64
Figure 2-57 SETUP Window
64
Figure 2-58 RECORDING Setup Window
64
Configuring Continuous/Motion Recording
65
Figure 2-59 CONTINUOUS/MOTION RECORDING Setup Window
65
Figure 2-60 Configuring SIZE/FPS/QUALITY Time Bar
66
Figure 2-61 Configuring SIZE/FPS/QUALITY Window
66
Table 2-4 Configurations for Continuous/Motion Recording
67
Figure 2-62 Configuring the Schedule
68
Figure 2-63 Selected Channels and Time
68
Configuring Alarm Setup
69
Figure 2-64 EVENT Window
69
Table 2-5 Color Codes for the Recording Modes
69
Configuring Panic Recording
70
Figure 2-65 PANIC RECORDING Setup Window
70
3 DVR Operation
71
Searching for Video
71
Figure 3-1 SEARCH Window
71
Searching the Calendar
72
Table 3-1 Recording Type Indicator Colors
72
Figure 3-2 PANO Playback Window
73
Figure 3-3 Playback Window
74
Figure 3-4 Playback Controls
74
Figure 3-5 INFORMATION Window
75
Figure 3-6 SEARCH Window
76
Searching for Events
76
Figure 3-7 SEARCH by EVENT Window
77
Figure 3-8 Playback Window
77
Archiving Data
78
Using NEW ARCHIVING to Archive Data
78
Figure 3-9 ARCHIVING Window
78
Using RESERVED DATA MANAGEMENT to See Archived Data
79
Figure 3-10 BURNING Window
79
Figure 3-11 RESERVED DATA MANAGEMENT Window
79
Table 3-2 AVI ARCHIVING LIST Functions
80
4 Using the Web Remote Viewer
81
Preparing for an Internet Connection
81
Port Forwarding
81
Minimum Internet Requirements
81
Table 4-1 Internet RA Minimum PC Requirements
81
Connecting to the Internet
82
Figure 4-1 Entering the User Name and Password for Internet Connection
82
Figure 4-2 ATM-Windows Internet Explorer Add-On Option Window
83
Figure 4-3 Activex Installation Window
83
Figure 4-4 Internet Options Window in IE
84
Figure 4-5 Security Settings - Trusted Sites Zone Window
84
Live Mode
85
Figure 4-6 Live Mode in an Internet Connection
85
Table 4-2 Live Mode Functions
85
Searching for Recorded Video
87
Searching by Timeline
87
Figure 4-7 Internet Search Window
87
Searching by Event
88
Figure 4-8 Searching by Timeline
88
Figure 4-9 Backup Configuration Window
88
Figure 4-10 Search by Event Window
88
Setup Mode
89
Figure 4-11 Event Search Query Results
89
Configuring Motion Detection
90
Figure 4-12 Internet Connection Camera Setup Window
90
Using an Internet Connection to Configure a Camera
90
Configuring the On-Screen Display
91
Figure 4-13 Motion Setting Configuration Window
91
Figure 4-14 OSD Setting Window
91
Configuring the Monitor
92
Configuring the Sound Settings
92
Figure 4-15 Monitor Setting
92
Figure 4-16 Audio/Buzzer Setting Window
92
Configuring the Recording Settings
93
Configuring the System Setup
93
Figure 4-17 Date/Time Setting Window
93
Configuring Users
94
Figure 4-18 Continuous/Motion Recording Setting Window
94
Figure 4-19 User Authority Setting Window
94
Configuring the Network
95
Figure 4-20 IP Setup Setting Window
95
Figure 4-21 E-Mail Setting Window
95
Configuring Sensors
96
Getting Information
96
Figure 4-22 Alarm Output Setting Window
96
Figure 4-23 Information about Your DVR
97
5 Watermark Process
99
Figure 5-1 Bplayer
99
Figure 5-2 Opening the Backup File
100
Figure 5-3 Checking the Watermark Message
100
Advertisement
Advertisement
Related Products
Honeywell HREP8
Honeywell HREP16
Honeywell HREP24
Honeywell HREP28
Honeywell HREP216
Honeywell HREP216X
Honeywell HREP28X
Honeywell HREP24X
Honeywell HREP 8
Honeywell HRSD16
Honeywell Categories
Thermostat
Controller
Control Unit
Security Camera
Accessories
More Honeywell Manuals
Login
Sign In
OR
Sign in with Facebook
Sign in with Google
Upload manual
Upload from disk
Upload from URL