Sign In
Upload
Manuals
Brands
Kenmore Manuals
Sewing Machine
UltraSoft 200
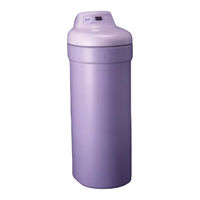
User Manuals: Kenmore UltraSoft 200 Water Softener
Manuals and User Guides for Kenmore UltraSoft 200 Water Softener. We have
2
Kenmore UltraSoft 200 Water Softener manuals available for free PDF download: Owner's Manual, Manual
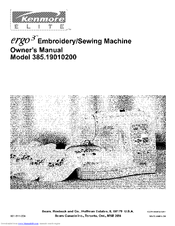
Kenmore UltraSoft 200 Owner's Manual (90 pages)
Embroidery/Sewing Machine
Brand:
Kenmore
| Category:
Sewing Machine
| Size: 7.55 MB
Table of Contents
Table of Contents
5
Name of Parts
8
Names of Parts
8
Available Accessories and Attachments
9
Section I1. Getting Readyto Sew
10
Connecting Machine to Power Supply
10
Before Usingyour Sewing Machine
10
Foryour Safety
10
Polarized Plug
10
Machine Operating Buttons
11
Start/Stop Button
11
Reverse Button
11
Patterns 1,2, 6 and 7
11
All Other Patterns
11
Auto-Lock Button
11
All the Other Patterns
11
Up/Down Needle Button
11
Speed Control Lever
11
Foot Control
12
Operation Instructions
12
Pressure Dial
12
To Drop or Raise the Feed Dogs
12
Extension Table
13
Detaching the Table
13
Attaching the Table
13
Presser Foot Lifter
13
Thread Cutter
14
Changing Needle
14
Changing Presser Foot
14
To Remove
14
To Attach
14
Correcting Distorted Stitch Patterns
15
Presser Foot Types
16
Zigzag Foot (Foot A)
16
Straight Stitch Foot (Foot H)
16
Automatic Buttonhole Foot (Foot R)
16
Zipper Foot (Foot E)
16
Overedge Foot (Foot C)
16
Satin Stitch Foot (Foot F)
16
Blind Hem Stitch Foot (Foot G)
16
1/4"Seam Foot (Foot O)
17
Embroidery Foot (Foot P)
17
Walking Foot
17
Selecting Needle and Fabric
18
Bobbin Winding
19
Removing the Hook Cover Plate
19
Horizontal Spool Pin
19
Additional Spool Pin
19
Bobbin Winding
20
Inserting the Bobbin
21
Threading the Machine
22
Built-In Needle Threader
22
Drawing up Bobbin Thread
23
Conventional Sewing
24
Visual Touch Screen
24
Mode Selection Keys
24
Pattern Selection
25
Utility Stitches
25
Machine Settings
26
Common Set Mode
26
Embroidery Set Mode
27
Flag Mode-Language Selection
27
Straight Stitch
28
To Sew
28
Securing Seam
28
Changing Sewing Direction
28
Needle Plate Guide Line
29
Straight Stitch
29
To Sew from the Edge of Thick Fabric
29
Quilting
29
Quilting with Walking Foot
30
To Attach the Walking Foot
30
Manual Adjustment of Straight Stitches
30
Changing Needle Drop Position
31
Changing Stitch Length
31
Adjust the Needle Thread Tension for Straight Stitch
32
Correct Tension
32
Tension Is too Tight
32
Tension Is too Loose
32
Variety of Straight Stitches
33
Lock-A-Matic Stitch
33
Locking Stitch
33
Triple Stretch Stitch
33
Stretch Stitch
34
Basting Stitch
34
Zipper Sewing
34
To Snap on the Zipper Foot
34
Fabric Preparation
35
To Sew
35
Zigzag Stitch
36
Manual Adjustment of Zigzag Stitch Width and Length
36
Changing Stitch Width
37
Changing Stitch Length
37
Adjust the Needle Thread Tension for Zigzag Stitch
38
Correct Tension
38
Tension Is too Tight
38
Tension Is too Loose
38
Variety of Overcasting Stitches
39
Overedge Stitch
39
Overedge Stitch (Using Zigzag Stitch)
39
Multiple Zigzag Stitch
39
Seam Finishing
39
Mending
39
Serging
40
Double Overedge Stitch
40
Blind Hem Stitch
41
To Sew
41
Shelltuck
41
Buttonhole
42
Various Kinds of Buttonholes and Their Uses
42
Square BH
43
Preparation for Sewing
43
To Sew
43
To Repeat Buttonhole Sewing
44
Changing Buttonhole Width
45
Changing Buttonhole Stitch Density
45
Corded Buttonhole
46
To Sew
46
Darning
47
To Sew
47
To Sew a Shorter Darning
47
To Sew the same Size Darning
47
To Adjust the Evenness of Darning
47
Tacking
48
To Sew a Shorter Tack
48
To Sew the same Size Tack
48
Eyelet
49
To Sew
49
To Adjust the Size of an Eyelet
49
Satin, Decorative Stitches and Monogramming
50
Key Functions
50
One Cycle Pattern Sewing Example: Pattern 28, LS
52
To Sew
52
Elongation Sewing Example: Pattern 28
52
Programming Pattern Combination Example: Pattern 28 and
53
To Sew
53
Example: Pattern 30
53
Programming French Knot Example: Pattern
54
To Sew
54
Combination of Satin Stitch and Decorative Stitch
54
Example: Pattern 28, 70
54
To Sew from the Beginning of a Combination Pattern with Beginning Key Example: Pattern 30
55
To Sew
55
Twin Needle Sewing
55
Individual Pattern Adjustment
56
Example:patterns 28, 30 and
56
Editing Programmed Patterns
56
Example
56
And 30
56
Combination of Patterns 28, 30 and 32
56
To Insert Pattern 38 between Pattern 28 and 30 in the Combination of Patterns 28, 30 and 32
56
Program Check
57
Example
57
And 38
57
Saving and Opening a File
58
Saving a File
58
Assigning a File Name
58
Opening a Saved File
59
Deleting a Saved File
59
Monogramming
60
Monogramming
61
Programming a Monogram Example: Programming in Block Type
61
Editing a Monogram
61
Deleting a Letter
61
Inserting a Letter (Character)
61
Embroidery
62
Getting Ready to Sew Embroidery
62
Embroidery Hoop F
62
Instruction for Template
62
Stabilizer
63
Types of Stabilizer
63
Tear-Away Stabilizer
63
Iron-On Stabilizer
63
Cut-Away Stabilizer
63
Water Soluble Stabilizer
63
Sticky Stabilizer
63
Usage
63
Adhesive (Iron-On) Stabilizer
63
To Attach the Stabilizer
64
To Set the Fabric in the Embroidery Hoop
64
To Attach the Embroidery Hoop to the Machine
65
To Attach Embroidery Foot P
65
Thread Holder
65
Built-In Embroidery Designs
66
Pattern Selection Window
66
Embroidery Mode Set
67
Embroidery Screen
68
Embroidery Screen
69
Starting to Sew Embroidery
70
Sewing Results
70
Monogram Embroidery
71
Monogram Selection Screen
71
2-Tetter Monogram
73
Example: 2-Letters with a Crest
73
Example: 2-Letters Without a Crest
73
Making Corrections
73
ATA PC Card
74
To Insert the ATA PC Card
74
To Eject the ATA PC Card
74
Selecting the Card Designs
74
Reader/Writer 19000
75
Connecting Reader/Writer 19000
75
Pattern Selection Screen
75
Edit Mode
76
Pattern Selection Windows in the Edit Mode
76
Selecting the Pattern on the Edit Screen
76
Moving the Selected Design
76
Cancel Key
77
Resizing the Selected Pattern
77
Flipping the Selected Pattern
77
Rotating the Selected Pattern
77
Changing the Fabric and Thread Colors
78
Fabric Color Change
78
Thread Color Change
79
Delete Key
78
Pattern Combination (Example 1)
80
Sewing Results
80
Pattern Combination (Example 2)
81
Sewing Results
82
Normal Maintenance
84
Replacing the Light Bulbs
84
To Replace the Light Bulb Behind the Face Cover
84
To Replace the Light Bulb on the Underside of the Sewing Arm
84
Cleaning the Hook Area
85
Assemble the Hook Race
85
Stitch/Design Chart
86
Conventional Sewing
86
Monogram
86
Built-In Embroidery Designs
87
Built-In Embroidery Monogram
87
Troubleshootin
88
Troubleshootin
89
Advertisement
KENMORE UltraSoft 200 Manual (37 pages)
Water softener with Deluxe Valve
Brand:
KENMORE
| Category:
Water Dispenser
| Size: 1.33 MB
Table of Contents
Precautions
1
Table of Contents
3
Water Softener Start up
4
Safety Guides
4
Check List of Step-By-Step Guides to Install
5
Program the Timer
6
Set Present Time of Day
6
Set Water Hardness Number
7
Set Recharge Time
7
Sanitize the Water Softener
8
Fill the Storage Tank with Salt
9
Water Softening Salt with Iron Removing Additives
9
Faceplate Timer Features
10
Extra Recharge
10
Recharge Now
10
Recharge Tonight
10
Optional Settings
11
Water Flow through the Softener
11
Recharge Time Remaining and Valve Position Indicators
12
Program Memory
12
Error Code
12
Soft Water Service and Regeneration
13
Water Flow through the Softener in Service
13
Water Flow through the Softener in Fill
13
Water Flow through the Softener in Brining and Brine Rinse
14
Water Flow through the Softener in Backwash
14
Water Flow through the Softener in Fast Rinse
14
Automatic Bypass
15
Electronics
15
Care of Your Water Softener
16
Salt: Refilling Storage Tank, Salt Bridge
16
Keeping the Water Softener Clean
17
Nozzle and Venturi
17
Iron from Resin Bed
17
Cleaning Nozzle and Venturi
17
Protect the Water Softener from Freezing
18
Drain All Water from Softener
18
Checklist to Help You Save Money
19
Dimensions/Specifications
20
Bypass Valves
20
Pressure Drop Vs Flow Rate
21
Service Tech Information
22
Troubleshooting
22
Wiring Schematic
22
Faceplate
22
Automatic Electronic Diagnostics
23
Manual Initiated Electronic Diagnostics
23
Turbine Operation
23
Position Switch Status
23
Valve Position Indicators
24
Other Information
24
Timer PWA Replacement
24
Manual Advance Regeneration Check
25
Fineboard Measurement
25
Rotary Valve Service
26
Disassembly
26
Servicing the Valve
26
Assembly
26
Water Flow through the Softener Valve
27
Service Cycle
27
Fill Cycle
27
Brining and Brine Rinse Cycles
28
Backwash Cycle
28
Fast Rinse Cycle
29
Repair Parts for Water Softener
30
Water Softener Complete
31
Inlet-Outlet Grounding Clamps
32
Brine Valve Assembly
33
Valve Assembly
34
Advertisement
Related Products
Kenmore 272.98300.491
Kenmore 272.98301.491
Kenmore 272.98302.491
KENMORE Sewing machine cabinet 272.98100.490
Kenmore 20
Kenmore 21
Kenmore 23
Kenmore UltraSoft 150
KENMORE 2002 Series
Kenmore 110.42932200110 .429242001 1 0 .42934 200110.4292620011 0 .42936200
Kenmore Categories
Ranges
Refrigerator
Dishwasher
Washer
Vacuum Cleaner
More Kenmore Manuals
Login
Sign In
OR
Sign in with Facebook
Sign in with Google
Upload manual
Upload from disk
Upload from URL