Sign In
Upload
Manuals
Brands
Sharp Manuals
All in One Printer
AR-BC320
User Manuals: Sharp AR-BC320 Color Laser MFP
Manuals and User Guides for Sharp AR-BC320 Color Laser MFP. We have
4
Sharp AR-BC320 Color Laser MFP manuals available for free PDF download: Service Manual, Operation Manual, Quick Reference Manual, Driver Installation
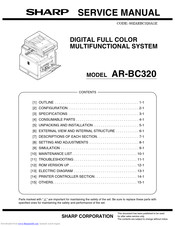
Sharp AR-BC320 Service Manual (344 pages)
DIGITAL FULL COLOR MULTIFUNCTIONAL SYSTEM
Brand:
Sharp
| Category:
All in One Printer
| Size: 36.28 MB
Table of Contents
Table of Contents
1
Service Manual
1
Newly Employed Technology
5
Configuration
6
Outline
5
Product Features
5
Product Line and Options
6
A. Line of Machines
6
B. Line of Options
6
C. Machine Configuration List
7
D. Combination of Options List
8
Block Diagram
9
Specifications
10
Basic Specifications
10
A. Base Engine
10
B. Paper Feed Unit
11
C. Paper Exit Unit
12
D. Scanner Section
12
Functional Specifications
13
A. Specifications of Copy Functions
13
B. Scanner Function
16
C. Reversing Automatic Document Feeder
19
Environment Conditions
20
A. Operating Environment Conditions
20
B. Storage Environment Conditions
20
C. Transit Environment Conditions
20
D. Standard Temperature and Humidity
20
Consumable Parts
21
Consumables (Kit, Unit)
21
Supply System Table
21
A. North America/Latin America
21
Photoconductor, Developer, Toner
22
Validity
22
Unpacking and Installation
23
Installing (Use) Conditions
23
A. Bringing Space
23
B. Installing Space
23
D. Floor Strength and Level
23
Humidity, Gasses, Chemicals, Vibration
23
Transit and Delivery
24
A. Implements, Facility, and Manpower
24
B. Delivery
24
Unpacking
24
A. Unpacking Procedure
24
A. Scanner (2/3 Mirror Unit) Lock Release
25
B. Main Body Cassette Lock Release
25
C. Transfer Unit Pressure Release
25
Fusing Heat Roller Pressing (F/R)
26
Black Drum Cartridge Insertion
27
Paper Exit Tray Installation
27
Toner Cartridges Installation
27
AC Cord Connection
28
Function and Operation Check
28
Image Quality Check
28
Machine Power on
28
Specifications Setup
28
Necessary Works before Moving the Machine
29
External View and Internal Structure
30
Setup and Adjustment Data Recording
29
A. External View
30
B. Internal Structure
31
C. Operation Panel
32
E. Cross Section
34
F. Motors, Clutches, Solenoids, Fans
36
G. Sensors, Switches and Heaters
37
Descriptions of each Section
42
Name and Function of each Section
30
A. Operational Descriptions
42
Fusing Section
42
B. Disassembly/Assembly/Maintenance
44
A. Operational Descriptions
48
Transfer Section
48
B. Disassembly/Assembly/Maintenance
51
Process (Image Forming) Section
56
A. Operational Descriptions
56
B. Disassembly/Assembly/Maintenance
60
Optical Section (Scanner Section)
63
A. Operational Descriptions
63
B. Disassembly/Assembly/Maintenance
66
Sections
68
A. Operational Descriptions
68
B. Disassembly/Assembly/Maintenance
74
Operation Panel
81
A. Operational Descriptions
81
B. Disassembly/Assembly/Maintenance
82
External Fitting
83
A. Disassembly
83
Others
85
A. Disassembly/Assembly/Maintenance
85
A. Operational Descriptions
88
RADF Section
88
B. Disassembly/Assembly/Maintenance
99
Setting and Adjustments
108
ADJ 1] High Voltage Adjustment
109
ADJ 2] Image Density Sensor Adjustment
111
LED (Writing) Unit)
113
ADJ 4] Image Registration Adjustment
116
ADJ 6] Copy Image Distortion Adjustment
123
CCD Unit Position Adjustment
126
ADJ 9] Main Scanning Direction Copy Image Position Adjustment (Scanner (Reading) Section)
127
Ratio Adjustment
127
Adjustment
128
ADJ 11] Copy Color Balance/Density Adjustment
129
ADJ 12] Fusing Pressure Adjustment
145
ADJ 13] Fusing Paper Guide Position Adjustment
145
ADJ 14] Document Size Sensor Adjustment
146
ADJ 16] Touch Panel Coordinates Setting
147
ADJ 17] Power Voltage Adjustment
147
ADJ 18] Fax/Scanner Mode Image Loss Adjustment
147
ADJ 19] RADF Adjustment
147
ADJ 20] Printer Color Balance Adjustment
149
ADJ 21] Collective Adjustment of Image Position and Magnification Ratio
153
A. Operating Procedures and Operations
155
Outline and Purpose
155
Simulation
155
B. Simulation List
157
C. Details
171
Maintenance List
236
Maintenance System Table
236
List
238
A. Drum Peripheral Section
238
B. Developing Section
238
C. Transfer Section
239
D. Fusing Section
240
E. Optical Section (Scanner Section)
241
F. Paper Feed Section, Transport Section
242
H. Filters, Drive Section, Others
243
I. RADF Section
244
And Machine Operations
244
A. Relationship of Maintenance Counter, Display Message, and Machine Operations
244
B. Relationship of Transfer Unit System Counter Display Message, and Machine Operations
245
C. Relationship of Fusing Unit Counter, Display Message, and Machine Operations
246
D. Relationship of Drum Cartridge System Counters Messages, and Machine Operations
246
E. Relationship of Toner Cartridge System Counters Display Messages, and Machine Operations
247
Functions and Purposes
248
Kinds of Self Diagnostic Messages
248
Outline
248
Self Diagnostic Operation
248
A. Self Diagnostic Operation and Work Flow
248
Troubleshooting
248
List
249
Details
250
A. Target ROM for Version up
274
B. When Version up of ROM Is Required
274
Outline
274
C. Flash ROM Version up Method
275
Rom Version up
274
Precautions
277
Version up
277
Flash ROM
278
Flash ROM Version up Procedure
279
Program Data of Flash ROM Is Written from the Computer to the Flash ROM of the ICU PWB
279
Flash Rom's
282
Block Diagram
287
D. Print Control Pwb
290
Electric Diagram
287
AC Power Line Diagram
291
DC Power Line Diagram
293
Actual Wiring Chart
294
Signal List
310
Printer Controller Section
313
System Configuration
313
A. Main Unit
313
B. Basic Composition
313
C. Accessory
314
D. Software, Firmware Diagram
314
A. Functional Specifications
315
B. Printer Driver Functionality
315
C. Memory Limitation Matrix
316
D. Print Area
317
Configuration Report (Test Page)
318
Hardware
319
A. Major Device
319
B. Block Diagram
319
C. Interface
320
Setting
321
A. Key Operator Program
321
B. Jumper Setting
323
Operation
323
A. Printer Driver Setting and Operation
323
Firmware Version up
325
A. Necessary Items
325
B. Procedure
325
AR-PK4 Installing Procedure
326
A. General
326
B. Check Items
326
C. PS Firmware ROM Installation
326
D. PS Fonts Installation and Uninstallation
326
E. PS Printer Utility Software Installation
327
Key Operator Program
328
Others
328
A. Classification of Set Items
328
Special Tools
329
List of Adjustment/Setup Values
330
Advertisement
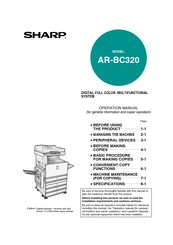
Sharp AR-BC320 Operation Manual (140 pages)
DIGITAL FULL COLOR MULTIFUNCTIONAL SYSTEM
Brand:
Sharp
| Category:
All in One Printer
| Size: 6.45 MB
Table of Contents
Table of Contents
9
The Product
1
Operation Manuals
5
Installation Requirements
7
Cautions
8
Table of Contents
9
Chapter 1 Before Using the Product
11
Introduction
12
Main Features
12
Saddle Stitch Finisher
13
Operation Manuals
12
Part Names and Functions
14
G Exterior
14
Exterior
14
G Interior
15
Interior
15
G Part Names and Functions of Peripheral Devices
16
Part Names and Functions of Peripheral Devices
16
G Operation Panel
18
Operation Panel
18
G Touch Panel
19
Touch Panel
19
Special Modes
19
Functions
19
Auditing Mode
21
G Using the Machine When the Auditing Mode Is Enabled
21
Using the Machine When the Auditing Mode Is Enabled
21
Chapter 2 Managing the Machine
23
Loading Paper
24
G Loading Paper in Paper Tray 1
24
G Changing the Paper Size in Paper Tray 1
24
Loading Paper in Paper Tray 1
24
Changing the Paper Size in Paper Tray 1
24
G Loading Paper in the Bypass Tray
26
Loading Paper in the Bypass Tray
26
Printing Onto Envelopes
28
G Loading Paper in the Stand/1 X 500 Sheet Paper Drawer
29
Stand/3 X 500 Sheet Paper Drawer
29
Loading Paper in the Stand/1 X 500 Sheet Paper Drawer/Stand/3 X 500 Sheet Paper Drawer
29
Specifications (Stand/1 X 500 Sheet Paper Drawer/Stand/3 X 500 Sheet Paper Drawer)
29
G Loading Paper in the Duplex Module/2 X 500 Sheet
30
Drawer
30
Loading Paper in the Duplex Module/2 X 500 Sheet Paper Drawer
30
Specifications (Duplex Module/2 X 500 Sheet Paper Drawer)
30
G Specifications of Paper Trays
31
Tray 1
31
Specifications of Paper Trays
31
Setting the Paper Type (Except the Bypass Tray)
33
Setting the Paper Size When an Extra Size Is Loaded
33
Setting the Paper Type and Paper Size in the Bypass Tray
34
Custom Settings
35
G Operation Procedure Common to All Custom Settings
35
Operation Procedure Common to All Custom Settings
35
G about the Settings
36
About the Settings
36
Replacing the Toner Cartridges
37
Storage of Supplies
39
Misfeed Removal
40
G Misfeed Removal Guidance
40
Area
40
Misfeed Removal Guidance
40
G Misfeed in the Stand/1 X 500 Sheet Paper Drawer
41
G Misfeed in the Stand/3 X 500 Sheet Paper Drawer
41
Misfeed in the Paper Feed Area
41
Misfeed in the Transport Area, Fusing Area, and Exit Area
42
Misfeed in the Stand/1 X 500 Sheet Paper Drawer
43
Misfeed in the Stand/3 X 500 Sheet Paper Drawer
43
G Misfeed in the Duplex Bypass/Inverter Unit and Duplex
44
Module/2 X 500 Sheet Paper Drawer
44
Misfeed in the Duplex Bypass/Inverter Unit and Duplex Module/2 X 500 Sheet Paper Drawer
44
Troubleshooting
46
Chapter 3 Peripheral Devices
49
Saddle Stitch Finisher
50
G Part Names and Functions
50
G Specifications
50
Part Names and Functions
50
Specifications
50
G Saddle Stitch Finisher Functions
52
Saddle Stitch Finisher Functions
52
G Using the Saddle Stitch Finisher
54
Output
54
Using the Saddle Stitch Finisher
54
Staple Cartridge Replacement and Staple Jam Removal
55
Misfeed in the Saddle Stitch Finisher
58
Troubleshooting Saddle Stitch Finisher Problems
60
Stapling Position Quick Reference Guide for Duplex Output
61
G Relation between Print Image and Saddle Stitch
62
Relation between Print Image and Saddle Stitch
62
Large Capacity Tray
63
G Part Name
63
G Specifications
63
Part Name
63
Specifications
63
G Loading Paper in the Large Capacity Tray
64
Loading Paper in the Large Capacity Tray
64
G Misfeed in the Large Capacity Tray
65
Misfeed in the Large Capacity Tray
65
Chapter 4 Before Making Copies
69
PART NAMES and FUNCTIONS (the Reversing Automatic Document Feeder)
70
G Exterior
70
Exterior
70
G Operation Panel
71
Operation Panel
71
G Touch Panel (Main Screen of Copy Mode)
72
Touch Panel (Main Screen of Copy Mode)
72
Reversing Automatic Document Feeder
73
G Acceptable Originals
73
Acceptable Originals
73
Setting Originals
74
Selecting the Original Size
76
Storing, Deleting, and Using Original Sizes
77
Chapter 5 Basic Procedure for Making Copies
79
Normal Copying
80
Copying from the Reversing Automatic Document Feeder
80
G Automatic Two-Sided Copying from the Reversing Automatic Document Feeder
84
Automatic Two-Sided Copying from the Reversing Automatic Document Feeder
84
Copying from the Document Glass
85
G Automatic Two-Sided Copying from the Document Glass
87
Automatic Two-Sided Copying from the Document Glass
87
Exposure Adjustments
88
Reduction/Enlargement/Zoom
90
G Automatic Selection (Auto Image)
90
Automatic Selection (Auto Image)
90
Manual Selection
91
Xy Zoom
93
Special Papers
95
Chapter 6 Convenient Copy Functions
97
G Dual Page Copy
97
Special Modes
98
G Common Operation Procedure for Using the Special Functions
99
Common Operation Procedure for Using the Special Functions
99
G Margin Shift
100
Margin Shift
100
G Erase
101
Erase
101
Dual Page Copy
102
G Centering
103
Centering
103
G Transparency Film with Insert Sheets
104
Transparency Film with Insert Sheets
104
G Covers
105
Covers
105
G B/W Reverse
106
B/W Reverse
106
Color Adjustments Menu
107
G RGB Adjust
108
RGB Adjust
108
G Sharpness
109
Sharpness
109
Suppress Background
109
Color Balance
110
G Brightness
111
G Intensity
111
Brightness
111
Intensity
111
Image Edit Menu
112
G Single Color
112
G Mirror Image
112
G Photo Repeat
112
G Multi Shot
112
G 11" X 17" (A3) Full-Bleed
112
Single Color
113
Mirror Image
113
Photo Repeat
114
Multi Shot
115
11" X 17" (A3) Full-Bleed
117
Multi-Page Enlargement
118
G Pamphlet Copy
120
Pamphlet Copy
120
Job Program Memory
121
G Storing a Job Program
121
Storing a Job Program
121
G Recalling a Job Program
122
G Deleting a Stored Job Program
122
Recalling a Job Program
122
Deleting a Stored Job Program
122
Interrupting a Copy Run
123
Chapter 7 Machine Maintenance (for Copying)
125
Removing an Original Misfeed
126
Document Feeder
126
Removing a Misfed Original from the Reversing Automatic Document Feeder
126
USER MAINTENANCE (for Copying)
127
Troubleshooting
128
Chapter 8 Specifications
131
Specifications
132
G Copier and Main Unit
132
Copier and Main Unit
132
G Reversing Automatic Document Feeder
134
G Duplex Bypass/Inverter Unit (Optional)
134
Reversing Automatic Document Feeder
134
Duplex Bypass/Inverter Unit (Optional)
134
Index
135
Sharp AR-BC320 Quick Reference Manual (59 pages)
Quick Reference Guide
Brand:
Sharp
| Category:
All in One Printer
| Size: 1.25 MB
Table of Contents
Options and Part Numbers
10
Basic Specifications
11
Special Tools
15
ROM Version up
29
Advertisement
Sharp AR-BC320 Driver Installation (28 pages)
DIGITAL FULL COLOUR MULTIFUNCTIONAL SYSTEM
Brand:
Sharp
| Category:
All in One Printer
| Size: 1.44 MB
Table of Contents
Table of Contents
1
Twain Driver
1
Installing the Printer
1
Trademark Acknowledgments
2
Introduction
3
About the CD-Rom
5
Installing the Printer Driver and Utilities (Software Installation)
6
Installation Method
7
Uninstalling Printer Drivers and Printer Utilities
18
Printer Drivers
19
Installing Printer Drivers Using the "Add Printer Wizard
20
Using the
21
Installing and Using the Twain Driver
22
Setting the Ip Address
23
Connecting the Machine to Your Computer
26
Advertisement
Related Products
Sharp AR-BC260
Sharp AR-M700U
Sharp AR-M230 Series
SHARP AR-2041
Sharp AR M207 - B/W Laser - All-in-One
Sharp AR-6023N
Sharp AR-PN4
Sharp AR-6020V
Sharp AR-6031N
Sharp AR-168L
Sharp Categories
Microwave Oven
LCD TV
TV
Stereo System
All in One Printer
More Sharp Manuals
Login
Sign In
OR
Sign in with Facebook
Sign in with Google
Upload manual
Upload from disk
Upload from URL