Sign In
Upload
Manuals
Brands
Toshiba Manuals
All in One Printer
e-STUDIO2550C e
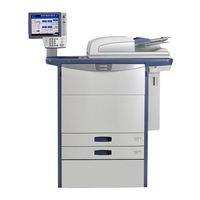
Toshiba e-STUDIO2550C e Printer Manuals
Manuals and User Guides for Toshiba e-STUDIO2550C e Printer. We have
1
Toshiba e-STUDIO2550C e Printer manual available for free PDF download: Management Manual
Toshiba e-STUDIO2550C e Management Manual (192 pages)
MULTIFUNCTIONAL DIGITAL COLOR SYSTEMS / MULTIFUNCTIONAL DIGITAL SYSTEMS
Brand:
Toshiba
| Category:
All in One Printer
| Size: 15.78 MB
Table of Contents
Preface
3
Table of Contents
5
Chapter 1 SETTING ITEMS (USER)
10
Accessing the User Menu
10
General
11
Changing the Display Language
11
Setting the Reversed Display
12
Adjusting the Display Setting
12
Setting the Auto Calibration
12
Setting the Calibration
12
Setting the Registration
13
Copy
14
Fax
15
Scan
16
E-Filing
18
List
19
Drawer
20
Address
22
Managing Contacts in Address Book
22
Managing Groups in Address Book
32
Check E-Mail
44
Print
45
Change User Password
46
Chapter 2 SETTING ITEMS (ADMIN)
49
Accessing the Admin Menu
49
General
51
Setting the Device Information
52
Setting the Notification
53
Changing the Administrator Password and Resetting the Service Password
54
Setting the Clock
55
Setting the Energy Saver Modes
57
Setting the Auto Power Save Mode
58
Setting the Calibration and Registration Display Level
60
Setting the Calibration
60
Changing the Smoothness of Print
61
Setting the Registration
61
Setting the Status Message
62
Setting the Auto Clear Function
62
Managing the Option Licenses
62
Adding or Removing Display Languages
65
Updating Your System
68
Creating or Installing Clone Files
71
Setting the Panel Calibration
76
Exporting Logs
76
Setting Job Skip
77
Changing the Keyboard Layout
78
Cleaning the Main Chargers and LED Print Heads
79
Setting the Pop-Up Messages
79
Setting the Option
79
Network
80
Setting the TCP/IP Protocol (Ipv4)
80
Setting the TCP/IP Protocol (Ipv6)
82
Setting the IPX/SPX Protocol
88
Setting the Netware Settings
89
Setting the SMB Protocol
90
Setting the Appletalk Protocol
91
Setting the HTTP Network Service
92
Setting the Ethernet Speed
93
Setting the LDAP Services and the Filtering Functions
94
Setting Ipsec (IP Security)
95
Checking the Network
96
Copy
98
Fax
100
Setting the Discard and Reduction Print Option for RX Print
100
File
101
E-Mail
102
Internet Fax
104
Security
105
Managing Certificates
105
Setting Secure PDF
111
Performing the Integrity Check
113
List/Report
115
Setting the Report
115
Setting the Communication Report
116
Setting the Reception List
117
Printing Lists
118
Printer/E-FILING
120
Wireless Setting
122
Change User Password
123
Settings
124
Setting IEEE 802.1X Authentication
125
Error Messages
127
Factory Default
128
Chapter 3 MANAGING COUNTERS (COUNTER MENU)
132
Total Counter
132
Print out Total Counter
135
Department Counter
136
Department Management
140
Logging on as Administrator
140
Printing the Department Code List
142
Enabling Department Codes
142
Registering a New Department Code
143
Editing Department Codes
145
Deleting Department Codes
147
Resetting the Counters for each Department
148
Setting Output Limitations for All Departments
149
Setting the no Limit Black Function
150
Setting the Registered Quota
151
Resetting All Department Counters
152
Deleting All Department Codes
153
Chapter 4 APPENDIX
156
Setting Letters
156
On-Screen Keyboard
156
On-Screen Numeric Keypad
157
List Print Format
158
Total Counter List
158
Department Code List
159
Address Book Information
160
Group Number Information
161
FUNCTION LIST (User)
162
NIC Configuration Page
163
FUNCTION LIST (Administrator)
165
PS3 Font List
184
PCL Font List
185
Index
187
Advertisement
Advertisement
Related Products
Toshiba E-studio2555cse
Toshiba E-studio2555c
Toshiba e-STUDIO2550C Series
Toshiba e-STUDIO2551C Series
Toshiba e-STUDIO255
Toshiba e-STUDIO2551C e
Toshiba e-STUDIO2500c
Toshiba e-STUDIO2505H
Toshiba E-STUDIO2500AC
Toshiba e-STUDIO2510AC
Toshiba Categories
Laptop
Air Conditioner
TV
LCD TV
All in One Printer
More Toshiba Manuals
Login
Sign In
OR
Sign in with Facebook
Sign in with Google
Upload manual
Upload from disk
Upload from URL