Sign In
Upload
Manuals
Brands
Sony Manuals
Camcorder
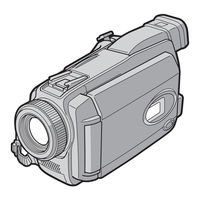
Handycam DCR-TRV38E
Sony Handycam DCR-TRV38E Manuals
Manuals and User Guides for Sony Handycam DCR-TRV38E. We have
5
Sony Handycam DCR-TRV38E manuals available for free PDF download: Operating Instructions Manual, Service Manual
Sony Handycam DCR-TRV38E Operating Instructions Manual (288 pages)
Sony Digital Video Camera Recorder Operating Instructions
Brand:
Sony
| Category:
Camcorder
| Size: 7.15 MB
Table of Contents
English
1
Digital Video Camera
1
Operating Instructions
1
Main Features
4
Principales Caractéristiques
6
Table of Contents
8
Recording on Tape
12
Recording a Picture on the Tape
13
Recording on "Memory Stick
14
Recording Still Images on the "Memory Stick
15
Getting Started
20
Using this Manual
20
Checking Supplied Accessories
23
Step 1 Preparing the Power Source
24
Installing the Battery Pack
24
Charging the Battery Pack
25
Connecting to a Wall Socket
29
Step 2 Setting the Date and Time
30
Step 3 Using the Touch Panel
33
Recording - Basics
36
Recording a Picture
36
Shooting Backlit Subjects - Back Light Function
45
Shooting in the Dark
46
Nightshot/Super Nightshot
46
Colour Slow Shutter
46
Checking Recordings - End Search/Edit Search/Rec Review
49
Playback - Basics
51
Playing Back Tape
51
To Display the Screen Indicators - Display Function
52
Viewing a Recording on TV
57
Advanced Recording Operations
59
Recording Still Images on "Memory Stick" During Tape Recording Standby or Tape Recording
59
Self-Timer Recording
61
Adjusting the White Balance Manually
63
Using the Wide Mode
65
Using the Fader Function
67
Using Special Effects - Picture Effect
70
Using Special Effects - Digital Effect
71
Using PROGRAM AE
74
Adjusting the Exposure Manually
76
Using Spot Light-Metering Function - Flexible Spot Meter
77
Focusing Manually
78
Using Spot Focus Function - Spot Focus
80
Interval Recording
81
Frame by Frame Recording - Frame Recording
83
Using the Viewfinder
84
Advanced Playback Operations
86
Playing Back Tape with Picture Effect
86
Playing Back Tape with Digital Effect
87
Enlarging Images Recorded on Tape - Tape PB ZOOM
88
Quickly Locating a Scene - Zero Set Memory
90
Searching the Boundaries of Recorded Tape by Title - Title Search
91
Searching a Recording by Date - Date Search
92
Editing
94
Dubbing Tape
94
Dubbing Only Desired Scenes - Digital Program Editing (on Tape)
97
Recording Video or TV Programmes
108
Inserting a Scene from a VCR - Insert Editing
112
Audio Dubbing
114
Superimposing a Title on a Cassette with Cassette Memory
119
Making Your Own Titles
122
Labelling a Cassette on a Cassette with Cassette Memory
124
Erasing All the Data in Cassette Memory
125
Using "Memory Stick" - Introduction
126
Selecting the Quality and Size of Image Data
131
Recording Still Images on "Memory Stick" - Memory Photo Recording
135
Recording an Image from Tape as a Still Image
139
Superimposing a Still Image in "Memory Stick" on an Image - MEMORY MIX
141
Interval Photo Recording
146
Recording Moving Pictures on "Memory Stick" - MPEG MOVIE Recording
147
Self-Timer Recording
149
Recording a Picture from Tape as a Moving Picture
151
Recording Edited Pictures from Tape as a Moving Picture - Digital Program Editing (on "Memory Stick")
154
Changing the Recording Folder
157
Viewing a Still Image - Memory Photo Playback
159
Viewing a Moving Picture - MPEG MOVIE Playback
162
Choosing Playback Folder
165
Enlarging Still Images Recorded on "Memory Stick" - Memory PB ZOOM
166
Playing Back Images Continuously - Slide Show
168
Preventing Accidental Erasure - Image Protection
169
Deleting Images - DELETE
170
Changing Image Size - Resize
173
Writing a Print Mark - Print Mark
174
Viewing Images with a Computer - Introduction
175
Connecting Your Camcorder to a Computer Using the USB Cable (for Windows Users)
179
Viewing Pictures Recorded on Tape on a Computer - USB Streaming (for Windows Users)
192
Viewing Images Recorded on "Memory Stick" on a Computer (for Windows Users)
201
Connecting Your Camcorder to a Computer Using the USB Cable (for Macintosh Users)
206
Viewing Images Recorded on "Memory Stick" on a Computer (for Macintosh Users)
209
Capturing Images from an Analog Video Unit on a Computer - Signal Convert Function
211
Customising Your Camcorder
213
Changing the Menu Settings
213
Troubleshooting
235
Types of Trouble and How to Correct Trouble
235
Self-Diagnosis Display
242
Warning Indicators
243
Warning Messages
244
Additional Information
255
Usable Cassettes
255
About the "Infolithium" Battery Pack
259
About I.link
262
Using Your Camcorder Abroad
264
Maintenance Information and Precautions
265
Specifications
273
Quick Reference
277
Identifying Parts and Controls
277
Index
286
French
16
Enregistrement Sur la Cassette
16
Guide de Démarrage Rapide
18
Enregistrement Sur Le « Memory Stick
18
Préparatifs
20
Utilisation de Ce Manuel
20
Precautions on Camcorder Care
22
Vérification des Accessoires
23
Étape Préparation de la Source D'alimentation
24
Mise en Place de la Batterie
24
E Étape Préparation de la Source D'alimentation
25
Recharge de la Batterie
25
Raccordement du Caméscope À Une
29
Prise Secteur
29
Étape Réglage de la Date Et de L'heure
30
Simple Setting of Clock by Time Difference
32
Étape Utilisation de L'écran Tactile
33
Step 3 Using the Touch Panel
34
E Étape Utilisation de L'écran Tactile
35
Enregistrement - Opérations de Base
36
Enregistrement D'une Image
36
Adjusting the Lcd Screen
40
Shooting with the Mirror Mode
41
Adjusting the Brightness of the Lcd Screen
42
Adjusting the Viewfinder
43
Digital Zoom (P
44
Zoom Numérique (P
44
Compensation de Contre-Jour (P
45
Prise de Vues de Sujets À Contre-Jour
45
Prise de Vues Dans L'obscurité
46
Nightshot/Super Nightshot/Colour Slow Shutter
46
Contrôle de L'enregistrement
49
Recherche de Fin
49
Point de Montage/Revue D'enregistrement
49
Edit Search
50
Rec Review
50
Lecture - Opérations de Base
51
Lecture D'une Cassette
51
Affichage des Indicateurs Sur L'écran
52
Fonction D'affichage
52
Various Playback Modes
54
Visionnage D'un Enregistrement Sur un Téléviseur
57
Viewing a Recording on Tv
58
Enregistrement - Opérations Avancées
59
Enregistrement D'images Fixes Sur un « Memory Stick » Pendant L'attente D'enregistrement Ou L'enregistrement Sur Cassette
59
Enregistrement Avec Le Retardateur
61
Réglage Manuel de la Balance des Blancs
63
Utilisation du Mode Grand Écran
65
Transitions en Fondu
67
Using the Fader Function
68
Transitions en Fondu
68
Utilisation D'effets Spéciaux - Effet D'image
70
Utilisation D'effets Spéciaux - Effet Numérique
71
Utilisation de la Fonction PROGRAM AE
74
Sports
74
Réglage Manuel de L'exposition
76
Utilisation de la Mesure Ponctuelle de L'exposition - Spotmètre Flexible
77
Mise Au Point Manuelle
78
Utilisation de la Mesure Ponctuelle de L'exposition - Mise Au Point Ponctuelle
80
Enregistrement Échelonné
81
Interval Recording
82
Enregistrement Image Par Image - Enregistrement D'images Figées
83
Utilisation du Viseur
84
Lecture - Opérations Avancées
86
Lecture D'une Cassette Avec Effet D'image
86
Lecture D'une Cassette Avec Effet Numérique
87
Agrandissement D'images Enregistrées Sur Une Cassette - PB ZOOM Cassette
88
Pb Zoom Cassette
89
Localisation Rapide D'une Scène - Remise À Zéro de la Mémoire
90
Recherche de Titres (P
91
Recherche D'une Séquence D'après Le Titre - Recherche de Titre
91
Recherche D'une Séquence D'après la Date - Recherche de Date
92
Recherche de Date
93
Montage
94
Copie D'une Cassette
94
Dubbing Tape
95
Dubbing a Tape
95
Copie de Séquences Précises - Montage Numérique de Séquences Programmées (Sur Cassette)
97
Enregistrement de Cassettes VIDéo Ou D'émissions de Télévision
108
Insertion D'une Séquence Depuis un Magnétoscope - Montage À Insertion
112
Inserting a Scene from a Vcr – Insert Editing
113
Doublage du Son
114
Monitoring the New Recorded Sound
118
Title (P
119
Titres (P
119
Incrustation D'un Titre Sur Une Cassette Avec Cassette Memory
119
Superimposing a Title on a Cassette with Cassette Memory
120
Erasing a Title
121
Création de Titres Personnalisés
122
Titrage D'une Cassette Avec Cassette Memory
124
Effacement de Toutes Les Données de la Cassette Memory
125
Memory Stick" Operations
126
Fonctionnement du « Memory Stick
126
Utilisation du « Memory Stick » - Introduction
126
Sélection de la Qualité Et de la Taille des Images
131
Selecting the Quality and Size of Image Data
132
Selecting the Moving Picture Size
133
Enregistrement D'images Fixes Sur un « Memory Stick » - Enregistrement de Photos Dans la Mémoire
135
Memory Photo Recording
136
Recording Images Continuously
137
Enregistrement D'images D'une Cassette Sous Forme D'images Fixes
139
Recording an Image from Tape as a Still Image
140
Incrustation D'une Image Fixe du « Memory Stick » Sur Une Autre Image - MEMORY MIX
141
Memory MIX
142
Enregistrement Échelonné de Photos
146
Enregistrement D'images Animées Sur un « Memory Stick » - Enregistrement MPEG MOVIE
147
Mpeg Movie Recording
148
Enregistrement Avec Le Retardateur
149
Enregistrement D'images D'une Cassette Sous Formes D'images Animées
151
Recording a Picture from Tape as a Moving Picture
152
Copie de Séquences D'une Cassette Sous
154
(Sur un « Memory Stick »)
154
Changement du Dossier D'enregistrement
157
Visionnage D'images Fixes - Lecture des Photos du « Memory Stick
159
Visionnage D'images Animées - Lecture MPEG MOVIE
162
Sélection du Dossier de Lecture
165
Agrandissement D'images Fixes Enregistrées Sur un « Memory Stick » - PB ZOOM Mémoire
166
Memory Pb Zoom
167
Lecture D'images en Diaporama - SLIDE SHOW
168
Prévention D'un Effacement Accidentel - Protection D'images
169
Suppression D'images - DELETE
170
Deleting Selected Images on the Index Screen
171
Deleting All the Images
172
Changement de la Taille des Images - RESIZE
173
Inscription de Marques D'impression - PRINT MARK
174
Visionnage D'images Sur un Ordinateur
175
Visionnage D'images Sur un Ordinateur - Introduction
175
Raccordement du Caméscope À un Ordinateur Par Le Câble USB (Utilisateurs de Windows)
179
For Windows Users
180
Installing the Usb Driver
182
Installation du Pilote Usb
182
Installing Image Transfer
184
Installing Imagemixer
185
MEMORY MIX (P
186
If You Cannot Install the Usb Driver
189
Visionnage Sur un Ordinateur D'images Enregistrées Sur Une Cassette - USB Streaming (Utilisateurs de Windows)
192
Visionnage Sur un Ordinateur D'images Enregistrées Sur un « Memory Stick » (Utilisateurs de Windows)
201
Raccordement du Caméscope À un Ordinateur Par Le Câble USB (Utilisateurs de Macintosh)
206
For Macintosh Users
207
Visionnage Sur un Ordinateur D'images Enregistrées Sur un « Memory Stick » (Utilisateurs de Macintosh)
209
Saisie D'images D'un Appareil VIDéo Analogique Sur un Ordinateur - Fonction de Conversion du Signal
211
Signal Convert Function
212
Personnalisation du Caméscope
213
Changement des Réglages des Paramètres des Menus
213
Selecting the Mode Setting of each Item
215
During Playback
237
Guide de Dépannage
245
Types de Problèmes Et Leurs Solutions
245
Affichage D'autodiagnostic
252
Indicateurs D'avertissement
253
Messages D'avertissement
254
Autres Informations
255
Cassettes Utilisables
255
Audio Mode
257
Mode Audio
257
A Propos de la Batterie « Infolithium
259
A Propos de la Norme I.link
262
Utilisation du Caméscope À L'étranger
264
Entretien Et Précautions
265
Spécifications
275
Réference Rapide
277
Nomenclature
277
Remote Commander
282
PROGRAM AE (P
284
Picture Effect (P
284
Digital Effect (P
284
Data Code (P
284
Zero Set Memory (P
285
Index
287
Advertisement
Sony Handycam DCR-TRV38E Service Manual (221 pages)
DIGITAL VIDEO CAMERA RECORDER
Brand:
Sony
| Category:
Camcorder
| Size: 6.44 MB
Table of Contents
Memory Stick
2
Ornamental Parts
7
Digital Video Camera
9
Operating Instructions
9
Declaration of Conformity
11
Main Features
12
Table of Contents
14
Quick Start Guide
16
Recording on Tape
16
Connecting the Power Cord
16
Inserting the Cassette
16
Recording a Picture on the Tape
17
Recording on "Memory Stick
18
Recording Still Images on the "Memory Stick
19
Getting Started
20
Using this Manual
20
Precautions on Camcorder Care
21
Checking Supplied Accessories
22
Step 1 Preparing the Power Source
23
Installing the Battery Pack
23
Charging the Battery Pack
24
Charging Time
25
Recording Time
25
Playing Time
26
Connecting to a Wall Outlet
28
Step 2 Setting the Date and Time
29
Simple Setting of Clock by Time Difference
31
Step 3 Using the Touch Panel
32
Recording - Basics
34
Recording a Picture
34
Indicators Displayed During Recording
36
Adjusting the Lcd Screen
37
Adjusting the Brightness of the Lcd Screen
38
Adjusting the Viewfinder
39
Using the Zoom Feature
40
Shooting Backlit Subjects - Back Light Function
41
Shooting in the Dark - Nightshot/Super Nightshot/Color Slow Shutter
41
Using Color Slow Shutter
42
Using the Nightshot Light
42
Checking Recordings - End Search/Edit Search/Rec Review
44
Edit Search
45
Rec Review
45
Playback - Basics
46
Playing Back Tape
46
To Display the Screen Indicators - Display Function
47
Using the Touch Panel
48
Various Playback Modes
49
Viewing a Recording on TV
51
If Your Tv or Vcr Is a Monaural Type
51
Advanced Recording Operations
53
Recording Still Images on "Memory Stick" During Tape Recording Standby or Tape Recording
53
Self-Timer Recording
55
Adjusting the White Balance Manually
56
Using the Wide Mode
57
Using the Fader Function
59
Using Special Effects - Picture Effect
62
Using Special Effects - Digital Effect
63
Using PROGRAM AE
66
Adjusting the Exposure Manually
68
Using Spot Light-Metering Function - Flexible Spot Meter
69
Focusing Manually
70
Using Spot Focus Function - Spot Focus
71
Interval Recording
72
Frame by Frame Recording - Frame Recording
73
Using the Viewfinder
74
Advanced Playback Operations
76
Playing Back Tape with Picture Effect
76
Playing Back Tape with Digital Effect
77
Enlarging Images Recorded on Tape - Tape PB ZOOM
78
Quickly Locating a Scene - Zero Set Memory
79
Searching the Boundaries of Recorded Tape by Title - Title Search
80
Searching a Recording by Date - Date Search
81
Searching for the Date Without Using Cassette Memory
82
Editing
83
Dubbing Tape
83
Dubbing a Tape
84
Dubbing Only Desired Scenes - Digital Program Editing (on Tape)
85
Erasing the Program You Have Set
92
Erasing All Programs
92
Recording Video or TV Programs
94
Inserting a Scene from a VCR - Insert Editing
96
Audio Dubbing
98
Monitoring the New Recorded Sound
101
Superimposing a Title on a Cassette with Cassette Memory
102
Erasing a Title
103
Making Your Own Titles
104
Labeling a Cassette on a Cassette with Cassette Memory
105
Erasing All the Data in Cassette Memory
106
?Memory Stick” Operations
107
Memory Stick" Operations
107
Using "Memory Stick" - Introduction
107
Selecting the Quality and Size of Image Data
110
Selecting the Moving Picture Size
112
Recording Still Images on "Memory Stick" - Memory Photo Recording
114
Recording Images Continuously
116
Recording an Image from Tape as a Still Image
118
Recording a Still Image from Other Equipment
119
Superimposing a Still Image in "Memory Stick" on an Image - MEMORY MIX
120
Interval Photo Recording
123
Recording Moving Pictures on "Memory Stick" - MPEG MOVIE Recording
124
Self-Timer Recording
126
Recording a Still Image
126
Recording a Picture from Tape as a Moving Picture
127
Recording a Moving Picture from Other Equipment
128
Recording Edited Pictures from Tape as a Moving Picture - Digital Program Editing (on "Memory Stick")
129
Making the Program
129
Changing the Recording Folder
131
Viewing a Still Image - Memory Photo Playback
132
Viewing a Moving Picture - MPEG MOVIE Playback
134
Choosing Playback Folder
136
Enlarging Still Images Recorded on "Memory Stick" - Memory PB ZOOM
137
Playing Back Images Continuously - Slide Show
138
Preventing Accidental Erasure - Image Protection
139
Deleting Images - DELETE
140
Deleting Selected Images on the Index Screen
141
Deleting All the Images
142
Changing Image Size - Resize
143
Writing a Print Mark - Print Mark
144
Viewing Images with a Computer - Introduction
145
Connecting Your Camcorder to a Computer Using the USB Cable (for Windows Users)
148
Installing the Usb Driver
150
Installing Image Transfer
151
Installing Imagemixer
152
Viewing Pictures Recorded on Tape on a Computer - USB Streaming (for Windows Users)
158
Viewing Images Recorded on "Memory Stick" on a Computer (for Windows Users)
165
Connecting Your Camcorder to a Computer Using the USB Cable (for Macintosh Users)
168
Viewing Images Recorded on "Memory Stick" on a Computer (for Macintosh Users)
170
Capturing Images from an Analog Video Unit on a Computer - Signal Convert Function
171
Using the Network Function
173
DCR-TRV39 Only
173
Accessing the Network
173
For Details, Refer to the Network
173
Customizing Your Camcorder
175
Changing the Menu Settings
175
Troubleshooting
186
Types of Trouble and How to Correct Trouble
186
During Recording
186
During Playback
188
Self-Diagnosis Display
194
Warning Indicators
195
Warning Messages
196
Additional Information
197
Usable Cassettes
197
Audio Mode
198
About the "Infolithium" Battery Pack
200
Effective Use of the Battery Pack
200
Battery Life
201
About I.link
202
Using Your Camcorder Abroad
204
Maintenance Information and Precautions
205
Moisture Condensation
205
Adjusting the Lcd Screen (Calibration)
207
About Care and Storage of the Lens
209
Specifications
211
Quick Reference
213
Identifying Parts and Controls
213
Remote Commander
218
Operation Indicators
219
Index
220
Revision History
221
Sony Handycam DCR-TRV38E Service Manual (92 pages)
Mini DV Digital Video Cassette, Digital Video Camera Recorder
Brand:
Sony
| Category:
Camcorder
| Size: 8.39 MB
Table of Contents
Table of Contents
4
Service Note
6
Power Supply During Repairs
6
To Take out a Cassette When Not Eject
6
Self-Diagnosis Function
7
Self-Diagnosis Display
7
Self-Diagnosis Code Table
8
Disassembly
9
P Cabinet (C) Assembly
10
Front Panel Section
11
Board
11
Microphone
12
Cabinet (R) Section
12
Panel Block Assembly
13
Board
13
Hinge Assembly
15
Board
15
Loud Speaker, Fp-635 Flexible Board
16
Battery Section
16
Battery Terminal Board
16
Top Cabinet Assembly
17
Evf Section
18
Vf Lens Assembly
19
Flexible Board
20
Board
21
Lens Section
24
Lens Block Assembly
25
Lens Device (Lsv-751A), CD-436 Board
25
Grip Lock Assembly
26
Cs Frame Assembly
27
Control Switch Block (Ps-2890)
28
Memory Stick Connector
28
Control Switch Block (Fk-4300)
31
Flexible Boards Location
31
3 Block Diagrams
34
Overall Block Diagram (3/4)
34
Overall Block Diagram (4/4)
34
Power Block Diagram (1/2)
34
Power Block Diagram (2/2)
34
Printed Wiring Boards and Schematic Diagrams
41
Frame Schematic Diagram (1/3)
42
Frame Schematic Diagram (2/3)
43
Frame Schematic Diagram (3/3)
43
Schematic Diagrams
44
CCD Imager)
44
Evf, Backlight)
44
P/Y Sensor, A/V-In)
44
MIC In, DV In/Out)
44
MIC In, Remocon Rec)
44
Lcd Backlight)
44
Flexible Board
44
Waveforms
44
Waveforms of the VC-315 Board Are Not Shown
69
Pages from 4-97 to 4-98 Are Not Shown
69
Mounted Parts Location
70
Repair Parts List
72
Exploded Views
72
Overall
74
Cabinet (R) Section
75
Panel Block Section
76
Cabinet (L) Section-1
77
Cabinet (L) Section-2
78
Evf Section
79
Lens Section
80
Overall (Mechanism Deck-Z100)
81
Ls Chassis Block Assembly
82
Mechanical Chassis Block Assembly
83
Electrical Parts List
84
Pages from 5-19 to 5-27 Are Not Shown
89
Advertisement
Sony Handycam DCR-TRV38E Service Manual (42 pages)
DIGITAL VIDEO CAMERA RECORDER
Brand:
Sony
| Category:
Camcorder
| Size: 12.37 MB
Table of Contents
Table of Contents
3
Schematic Diagrams
4
Schematic Diagram
8
Schematic Diagram
11
Schematic Diagram
13
Schematic Diagram
15
Schematic Diagram
16
Schematic Diagram
17
Schematic Diagram
20
Schematic Diagram
21
VC-315 (9/17)(Rec/Pb Head Amp)
21
Schematic Diagram
22
VC-315 (10/17)(Video In/Out Agc)
23
Schematic Diagram
25
VC-315 (11/17)(Servo Processor)
25
Schematic Diagram
26
VC-315 (12/17)(Hi)
26
Schematic Diagram
27
VC-315 (13/17)(Camera/Mecha Cont)
27
Schematic Diagram
28
VC-315 (15/17)(Audio I/O Interface Audio A/D- D/A Converter)
28
VC-315 (16/17)(Usb Signal Process)
29
VC-315 (17/17)(Converter)
30
Printed Wiring Boards
30
Mounted Parts Location
30
Repair Parts List
32
Electrical Parts List
32
Sony Handycam DCR-TRV38E Service Manual (42 pages)
Service Manual
Brand:
Sony
| Category:
Camcorder
| Size: 13.02 MB
Table of Contents
Table of Contents
3
Schematic Diagrams
4
Schematic Diagram
8
Schematic Diagram
13
Schematic Diagram
17
Schematic Diagram
18
Schematic Diagram
19
Schematic Diagram
20
Schematic Diagram
21
Schematic Diagram
22
Schematic Diagram
25
Schematic Diagram
26
VC-315 (11/17)(Servo Processor)
26
Schematic Diagram
27
VC-315 (12/17)(Hi)
27
Schematic Diagram
28
Printed Wiring Boards
30
Mounted Parts Location
30
Repair Parts List
32
Electrical Parts List
32
Revision History
42
Advertisement
Related Products
Sony Handycam DCR-TRV380
Sony DCR-TRV38 PIXELA ImageMixer v1.5
Sony Handycam DCR-TRV320
Sony D8 Digital Handycam DCR-TRV310E
Sony Handycam DCR-TRV361
Sony Handycam DCR-TRV330E
Sony Handycam DCR-TRV341E
Sony DCR-TRV340 - Digital8 Camcorder w/ 2.5" LCD USB Streaming
Sony DCR-TRV30 - Digital Video Camera Recorder
Sony DCR-TRV33 PIXELA ImageMixer v1.5
Sony Categories
Laptop
TV
CD Player
Camcorder
Digital Camera
More Sony Manuals
Login
Sign In
OR
Sign in with Facebook
Sign in with Google
Upload manual
Upload from disk
Upload from URL